WordPress is one of the most popular content management systems (CMS) in the world, powering over 40% of websites on the internet. Whether you’re building a personal blog, an online store, or a business website, WordPress is a flexible and user-friendly platform that can suit your needs. In this guide, we’ll walk you through how to install WordPress, step-by-step, so that even beginners can get their website up and running without any technical headaches.
Pre-Installation Checklist
Before we dive into the installation process, it’s important to make sure you have everything ready:
- Domain Name: This is your website’s address (e.g. yourwebsite.com). If you haven’t done so yet, you’ll need to register a domain.
- Web Hosting: You’ll need a hosting provider to store your website’s files and other data. Consider setting up your new website on our WordPress Hosting platform.
- FTP Access (Optional): If you plan to install WordPress manually, you might need FTP access to upload files to your hosting server.
Method 1: Installing WordPress with a Hosting Provider’s Auto-Installer
Many hosting providers offer easy installation methods for WordPress directly through cPanel using tools like WordPress Management, Softaculous, or Installatron. These auto-installers make setting up WordPress quick and easy, even for beginners. Let’s break down how to install WordPress using these tools step-by-step.
Installing WordPress Using cPanel’s WordPress Management
cPanel’s WordPress Management is a built-in tool available in most hosting providers’ cPanel dashboards, designed specifically for managing and installing WordPress.
Step 1: Login to cPanel
Login to your cPanel account via VIPcontrol or by using your login credentials. If you’re unsure what your login details are, please follow the steps in this guide to reset them.
If you’re setting up WordPress with another hosting provider, you can still follow this guide. Just be sure to access cPanel via their client portal or use the login details they provide.
Step 2: Find the WordPress Management
Once inside cPanel, you can click on WordPress Management to the left of the page OR use the Search functionality to the top right of the page to find it.

Alternatively, scroll down until you find the WordPress Management icon under the “Applications” or “Software” section.
Step 3: Start the Installation
Click the WordPress Management icon, and you’ll see an option to install WordPress. Select “Install,” and the tool will guide you through the setup process.

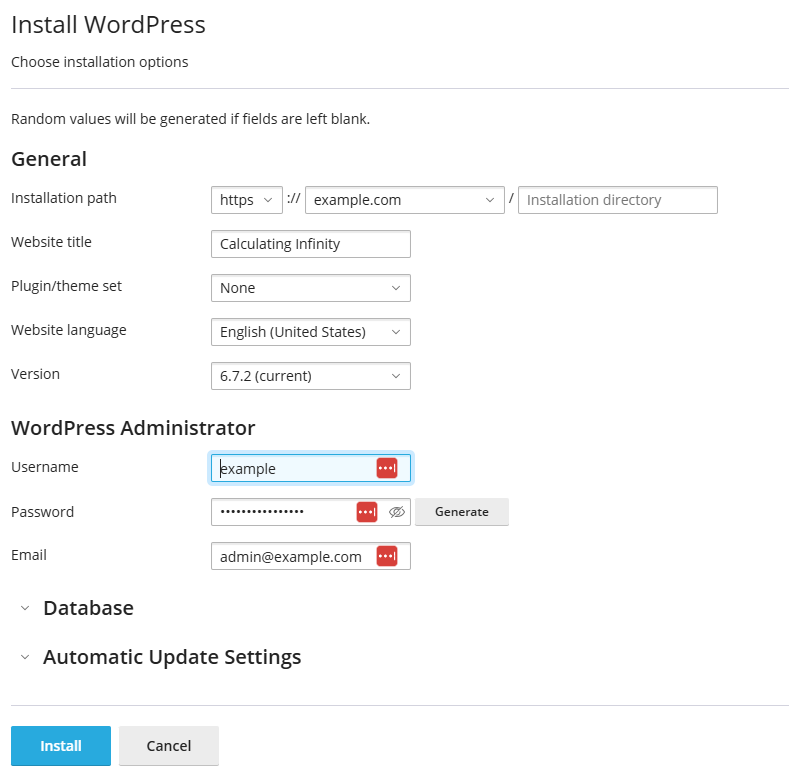
Step 4: Fill Out Installation Details

- Domain: Choose the domain or subdomain where you want to install WordPress.
- Site Name: Enter your website’s name (you can change this later).
- Admin Username & Password: Create your WordPress admin credentials. Be sure to use a strong password.
- Database: You usually won’t need to adjust the database settings unless your host requires it.
Once these details are filled in, click “Install”. The WordPress Management will handle the rest, setting up your WordPress site in a few minutes.
Step 5: Access WordPress
After installation is complete, you can access your WordPress dashboard by visiting your domain, followed by /wp-admin (e.g. www.yoursite.com/wp-admin).
Installing WordPress Using Softaculous
Softaculous is another popular auto-installer found in cPanel that can be used to install WordPress with just a few clicks.
Step 1: Log in to cPanel
Login to your cPanel account via VIPcontrol or by using your login credentials. If you’re unsure what your login details are, please follow the steps in this guide to reset them.
If you’re setting up WordPress with another hosting provider, you can still follow this guide. Just be sure to access cPanel via their client portal or use the login details they provide.
Step 2: Find the Softaculous App Installer
Once logged in, scroll down to the Softaculous Apps Installer section, usually under the “Software” or “Applications” section.

Step 3: Begin the Installation
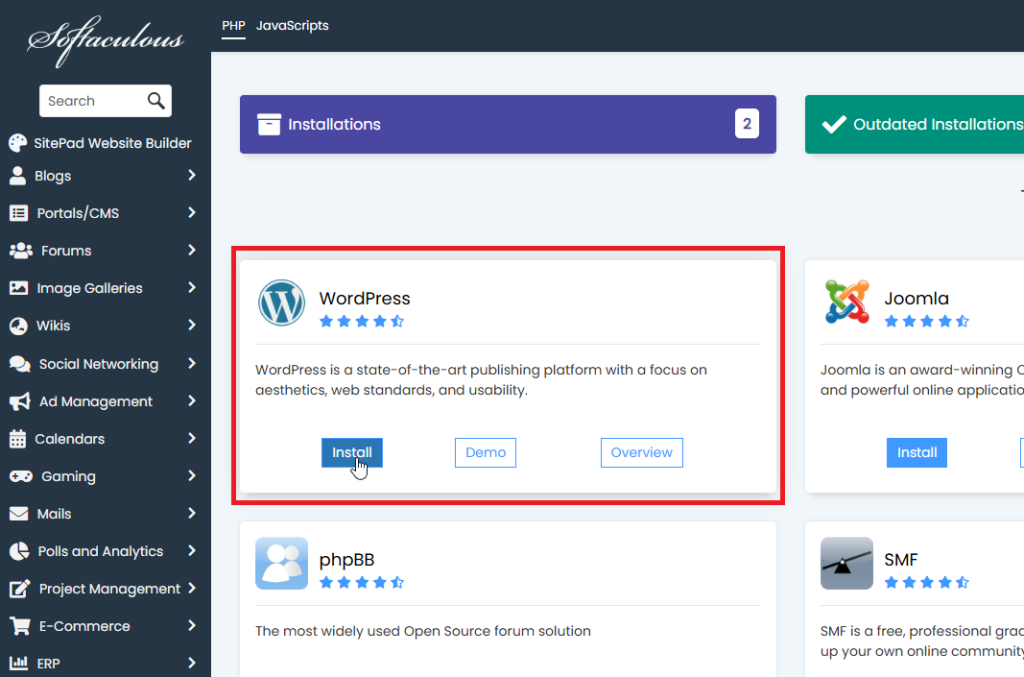
Click the “Install” button under WordPress, in the Softaculous dashboard.

Step 4: Configure Installation Settings
- Choose Domain: Select the domain or subdomain where you want WordPress installed.
- Directory (optional): Leave this blank if you want WordPress installed at your root domain (e.g., www.yoursite.com). If you enter a directory (e.g., “blog”), WordPress will install in www.yoursite.com/blog.
- Site Name and Description: Enter the name and description of your site (this can be changed later).
- Admin Username, Password, and Email: Create a strong username and password for the WordPress admin dashboard and enter a valid email address for admin notifications.
- Select Language: Choose the language for your WordPress site.
- Advanced Options: If you want to specify database details or file permissions, you can adjust these in the “Advanced Options” section. Otherwise, leave these at the default settings.
Step 5: Install WordPress
Once you’ve filled in all the necessary details, click “Install”. Softaculous will take care of everything and install WordPress in just a minute or two.
Step 6: Access Your WordPress Site
After the installation is complete, Softaculous will provide a link to your WordPress site and your admin dashboard (e.g. www.yoursite.com/wp-admin). Log in with the username and password you created earlier.
Installing WordPress Using Installatron
Installatron is another cPanel-based auto-installer that simplifies the WordPress installation process.
Step 1: Log in to cPanel
Login to your cPanel account via VIPcontrol or by using your login credentials. If you’re unsure what your login details are, please follow the steps in this guide to reset them.
If you’re setting up WordPress with another hosting provider, you can still follow this guide. Just be sure to access cPanel via their client portal or use the login details they provide.
Step 2: Find Installatron
In your cPanel dashboard, scroll down to the Installatron Applications Installer section (it may be under “Software” or “Applications”).

Step 3: Begin the Installation
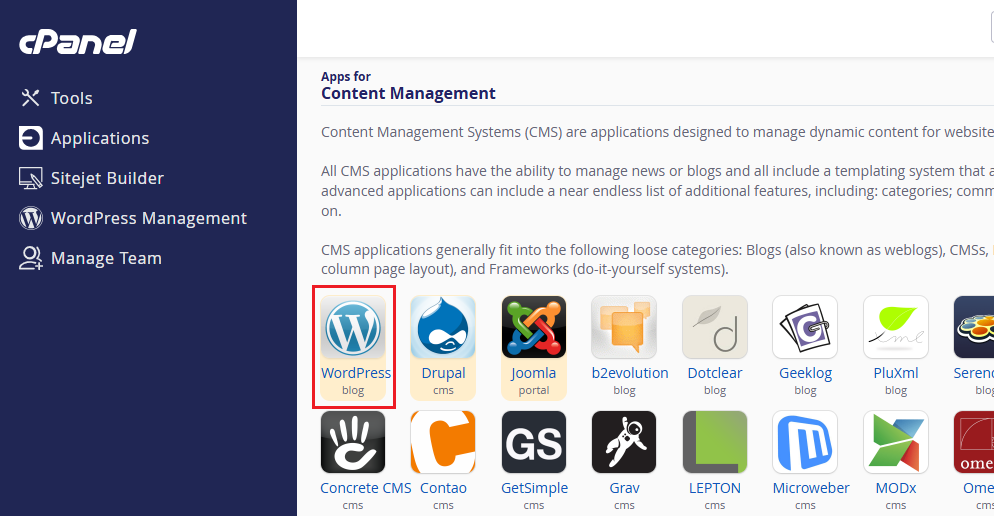
Inside the Installatron dashboard, click on WordPress under “Apps for Content Management”.

Then click on “Install Application”:

Step 4: Configure WordPress Settings
- Domain: Choose the domain or subdomain where WordPress will be installed.
- Directory: Leave this blank for a root installation or specify a folder (e.g., “/blog”) if you want WordPress installed in a subfolder.
- Site Title and Tagline: Fill in your website’s name and tagline.
- Admin Username, Password, and Email: Create your admin credentials and provide an email for account recovery or site notifications.
- Advanced Settings: Most users can leave the advanced options at their default settings, but you can customize your database name, table prefixes, and more if needed.
Step 5: Install WordPress
Once you’ve configured the settings, click “Install.” Installatron will begin installing WordPress, which only takes a few moments.
Step 6: Access WordPress
Once the installation is complete, Installatron will give you a link to your new WordPress site and the admin area (www.yoursite.com/wp-admin). Log in with your newly created credentials.
Method 2: Manual Install WordPress (Advanced)
A manual WordPress installation is the way to go for those who want more control over the installation process or whose hosting provider doesn’t offer an auto-installer. Keep in mind that the following is an advanced guide.
Step 1: Download WordPress
- Go to WordPress.org and download the latest version of WordPress.
- Once the download is complete, unzip the file. You should see a folder named “WordPress”.
Step 2: Upload WordPress Files to Your Server
- Connect to your hosting server using an FTP client like FileZilla. Your hosting provider should provide you with FTP credentials.
- Once connected, upload the contents of the WordPress folder to your server’s public_html directory (or root directory).
Step 3: Create a MySQL Database
- Login to your hosting control panel (usually cPanel) and look for the “MySQL Databases” option.
- Create a new database and assign it a name.
- Create a database user, and make sure to assign this user all privileges on the database.
Step 4: Run the WordPress Installation Script
- Ensure your domain name is pointing at your VentraIP web hosting service.
- In your browser, navigate to your domain (e.g. www.yourwebsite.com).
- The WordPress setup wizard will appear. Click “Let’s Go!” to start the process.
- You’ll be prompted to enter the database information you created earlier: database name, username, password, and database host (usually “localhost”).
- Once entered, click “Submit” and then “Run the installation.”
Step 5: Complete the Installation
- You’ll be asked to provide a site title, admin username, and password. You’ll use these credentials to login to your WordPress dashboard.
- After filling in the details, click “Install WordPress.”
Congratulations! You’ve successfully installed WordPress manually. You can now log in to your new site by going to www.yourwebsite.com/wp-admin.
Post-Installation Setup
After the installation, it’s time to set up your website.
Setting Up Your WordPress Admin Dashboard
- Once logged in, you’ll be greeted by the WordPress dashboard. Here, you can manage all aspects of your website, from adding posts to changing themes.
- Familiarize yourself with the dashboard. The most important sections for beginners include “Posts,” “Pages,” “Appearance,” and “Settings.”
Basic Settings to Configure
- Site Title & Tagline: Go to “Settings” > “General” to set your site title, tagline, and time zone.
- Permalinks: In “Settings” > “Permalinks,” choose a URL structure. We recommend “Post name” for SEO purposes.
- Reading Settings: Decide whether your homepage should display the latest blog posts or a static page.
Choosing a Theme and Installing Plugins
- Themes: Go to “Appearance” > “Themes” to browse and install themes. WordPress has thousands of free and premium themes available. Choose one that suits your brand.
- Plugins: Extend the functionality of your site by installing plugins. Some essential plugins include SEO tools (like RankMath or Yoast), caching plugins (for speed), and security plugins.
Troubleshooting Common WordPress Installation Issues
If something goes wrong during installation, here are a few common problems and how to fix them:
- Error Establishing a Database Connection: Double-check your database name, username, and password. Ensure they match the credentials set in your wp-config.php file.
- Memory Limit Exhausted: Increase the memory limit by editing the wp-config.php file and adding this line:
define('WP_MEMORY_LIMIT', '256M');. You may also need to increase PHP memory limit inside cPanel. - File Permission Issues: Ensure your files have the correct permissions (usually 755 for directories and 644 for files).
Bonus Steps
Now that you’ve setup your new WordPress website, check out these blog posts on WordPress best practices, security tips and how to start generating traffic to your website:
- Best Practices for Optimising Your Hosting Service for WordPress
- WordPress Security 101 – All you need to know
- How To Get More Traffic To Your Website
Conclusion
Installing WordPress is easier than it might seem, whether you use an auto-installer or manually upload the files. By following this guide, you should now have your WordPress site up and running, ready for customization and content creation. If you encounter any issues or need help, don’t hesitate to contact us — we’re here to assist!

