


Support Centre
Find the answers to your questions and get the support you need with the VentraIP help centre.
Browse by Popular

Domain Name
- What is a domain name?Eligibility criteria for registering .AU domain namesPremium domain names explained

Web Hosting
View All
Email Hosting
View All
Google Workspace
- Getting Started with Google WorkspaceGoogle Workspace support resourcesTransferring an existing Google Workspace service to VentraIP

Account
- How do I reset my VIPcontrol password?How do I create a VentraIP account?How can I see who accessed my VentraIP account?

Troubleshooting
- How do I clear my browser cache?Troubleshooting a ‘500 internal server' errorTroubleshooting with a ping test
Testing your website before pointing your domain to our servers
Before proceeding
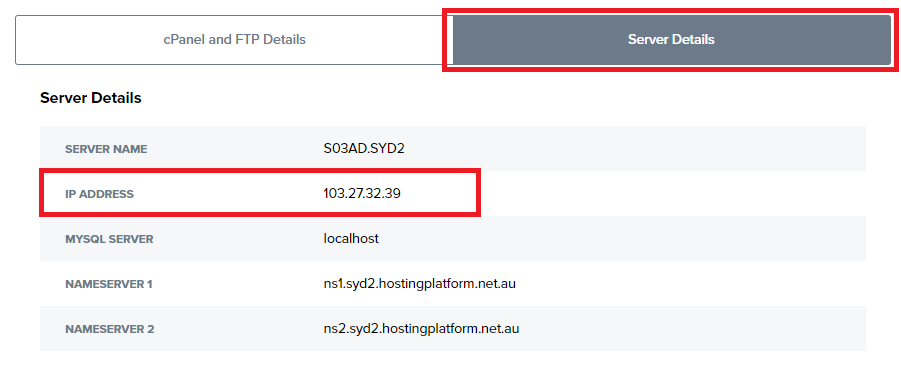
You will need to find out what the IP Address of your web hosting service. You can find this information by following these steps:
- Log in to VIPcontrol.
- Click on My Services at the top of the page.
- Click on cPanel Hosting.
- Click Manage next to your web hosting service.
- Click on Server Details, you will see the server’s IP Address listed here.
Once you have this information, you will be able to follow the steps for your Operating System below.
Modifying your computer’s Hosts file
You can update your computer’s hosts file to view your website on our servers, before pointing it at our servers. Updating this file basically tricks your computer into thinking your domain name is pointing at our server, when it actually isn’t.
Windows 7 – 10
- Open the Windows Start Menu
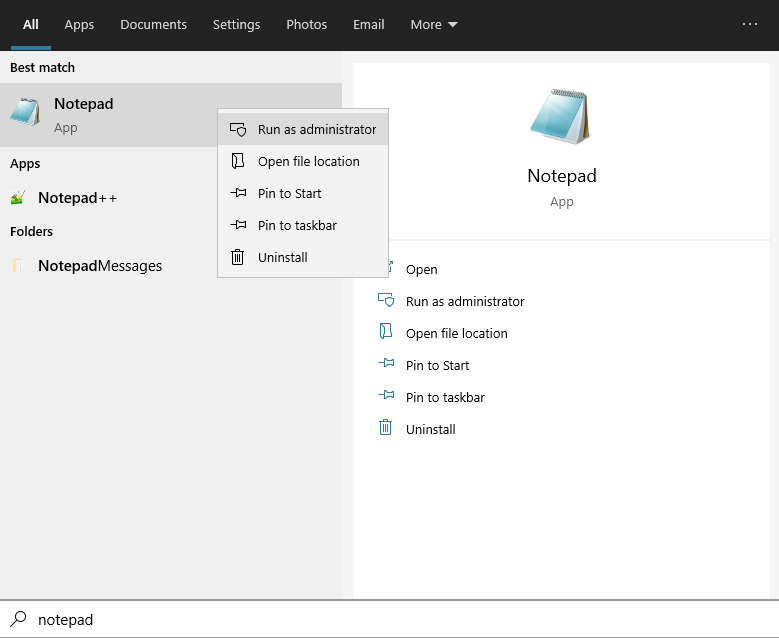
- Type “Notepad” to search, then right-click on Notepad, then click Run as administrator.
- Go to File → Open.
- In the File name field, type the following, then click Open:
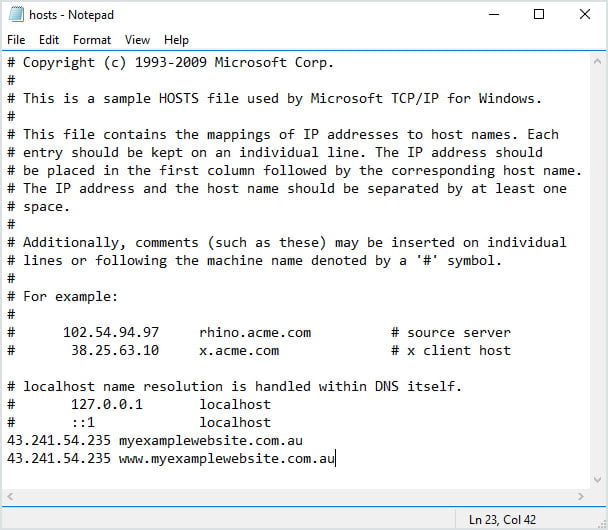
c:\windows\system32\drivers\etc\hosts - In the file that appears, you will need to input new entries just like the example provided at the bottom of the file in this screenshot.
Use the following format:
<IP Address> <space> <domain>
<IP Address> <space> <www. domain>
- Once you have added your entries to the file, navigate to File → Save.
- Once you have saved the file you can close the window, then visit your website in your favourite web browser.
Mac OSX
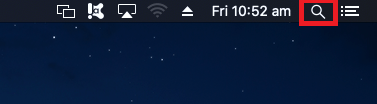
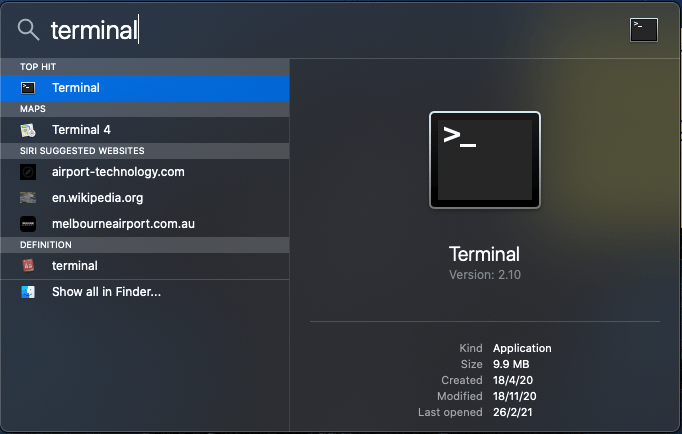
- Open Spotlight search by clicking on the search icon to the top right of the screen (or by using the Command + Space keyboard shortcut)
- Search for “Terminal” then hit Enter on your keyboard to open the application
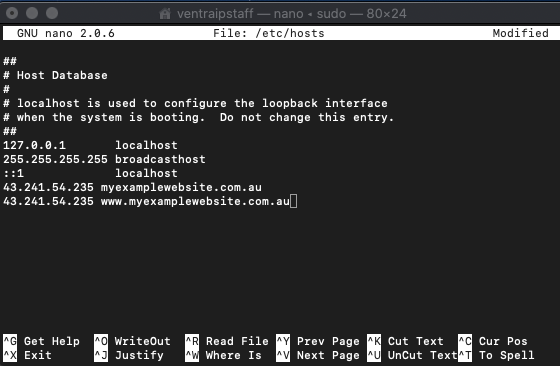
- When the terminal Application opens, you will need to type “sudo nano /etc/hosts” (no quotes), then hit Enter

- You will be prompted for your password, enter that then hit Enter again
- A text editor will open within the Terminal window. Note: The cursor can only be controlled using the UP, DOWN, LEFT, RIGHT keys on your keyboard
- Here you will input the new hosts file entries, following the example given in this screenshot
- Once you have updated the file hit CTRL + O (the letter O not zero) on your keyboard, then hit Enter to save the file
- Then hit CTRL + X to close the file
- Once you have saved the file you can close the window, then visit your website in your favourite web browser (e.g. myexamplewebsite.com.au)

We Are Here to Help You
Get in touch with one of our local experts at any time.