Browse by Popular

Domain Name
- What is a domain name?Eligibility criteria for registering .AU domain namesPremium domain names explained

Web Hosting
View All
Email Hosting
View All
Google Workspace
- Getting Started with Google WorkspaceGoogle Workspace support resourcesTransferring an existing Google Workspace service to VentraIP

Account
- How do I reset my VIPcontrol password?How do I create a VentraIP account?How can I see who accessed my VentraIP account?

Troubleshooting
- How do I clear my browser cache?Troubleshooting a ‘500 internal server' errorTroubleshooting with a ping test
Upgrading your web hosting plan
Upgrade Select Hosting Service
Our Select Hosting plans allow you to specify the exact Disk Space, CPU and Memory limits you want when upgrading or downgrading the service.
Changes to your plan can be done at any time and you do not need to wait until the end of your billing period.
Adding or removing resources
-
- Log in to VIPcontrol.
- Click on My Services at the top of the page.
- Click on cPanel Hosting.
- Click Manage next to the service you want to change the resource limits for.
- Click on Upgrade/Downgrade under Account.
- Click on Upgrade/Downgrade.
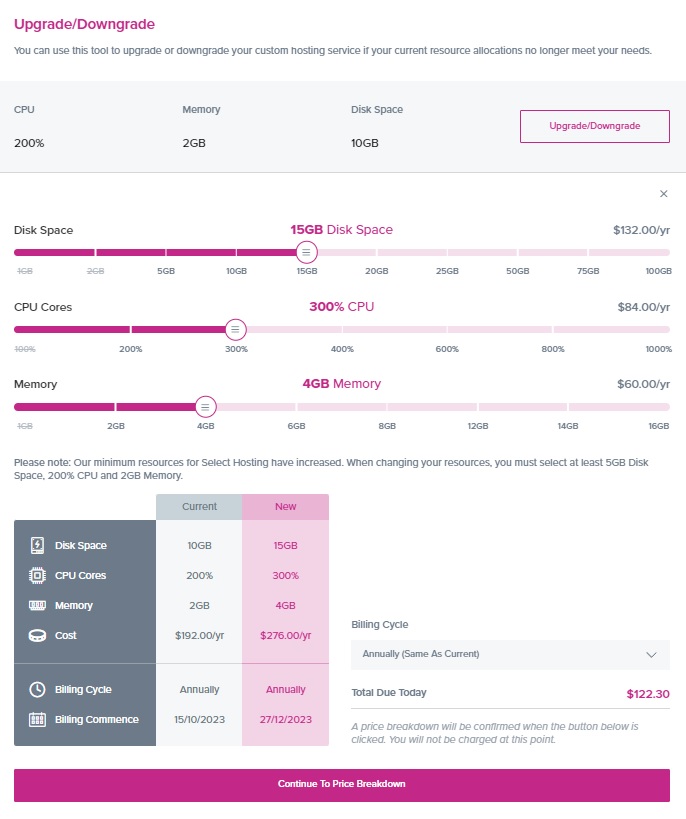
- Sliders for Disk Space, CPU Cores and Memory will appear. You can adjust them to whatever you like.
- Click Continue to Price Breakdown.

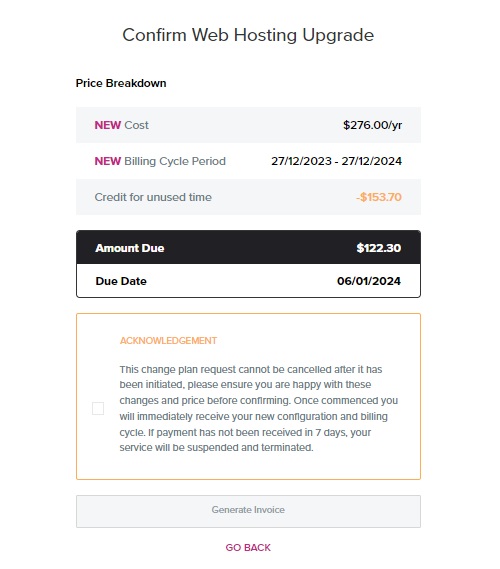
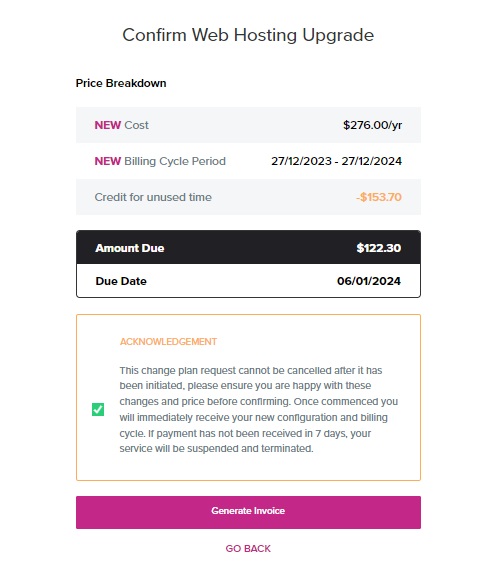
- Review the price breakdown carefully. If everything looks good, check the acknowledgement and click Generate Invoice to proceed.


What happens next?
Your new resource limits will be applied instantly.
After confirming your new plan configuration, our system will calculate the difference between what you’ve spent on your old plan, and compare it to the cost of your new plan. The difference will either be charged to you via an invoice (where the new plan has a higher cost) or returned to you as an account credit (where the new plan costs less).
Upgrade Legacy Service
You can upgrade your legacy web hosting plan to the new Select Hosting system at any time if you find yourself hitting the limits of your current plan.
- Login to VIPcontrol
- Click on My Services on the top → select Hosting.
- Click on the Manage button on the right for the service you wish to upgrade.
- On the left side under Account choose the Upgrade Plan option. If this is not available to you, please contact our Accounts and Billing team to have this manually processed.
- Select View Plans to find the available upgrade options.
- Click Upgrade on the plan and billing cycle that you wish to continue with → Confirm Upgrade to finalise the process.
- Your service will then be upgraded and an invoice will be generated for the difference (if applicable).
You may be eligible for a pro-rata refund on any prepaid amount, however, you will lose any coupon discount used on your initial order. These will be managed in line with our terms and conditions as posted on our website.
