


Support Centre
Find the answers to your questions and get the support you need with the VentraIP help centre.
Browse by Popular

Domain Name
- What is a domain name?Eligibility criteria for registering .AU domain namesPremium domain names explained

Web Hosting
View All
Email Hosting
View All
Google Workspace
- Getting Started with Google WorkspaceGoogle Workspace support resourcesTransferring an existing Google Workspace service to VentraIP

Account
- How do I reset my VIPcontrol password?How do I create a VentraIP account?How can I see who accessed my VentraIP account?

Troubleshooting
- How do I clear my browser cache?Troubleshooting a ‘500 internal server' errorTroubleshooting with a ping test
Adding, removing, and managing DNS records in cPanel
Please be aware that DNS records modified in cPanel only work if the VentraIP cPanel web hosting nameservers are being used; if any other nameservers are being used on the domain name these records will not be applicable.
Adding or Editing DNS records
- Log in to your cPanel service.
- Click on the Zone Editor icon.
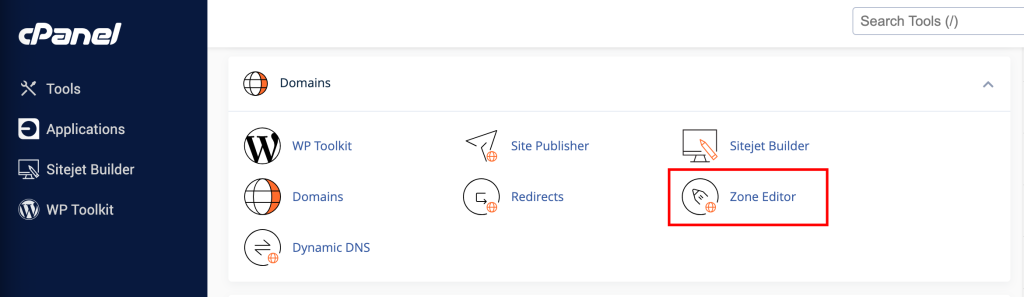
- Here you can quickly add A, CNAME, or MX records. For more options click Manage to the right of the domain you wish to edit.
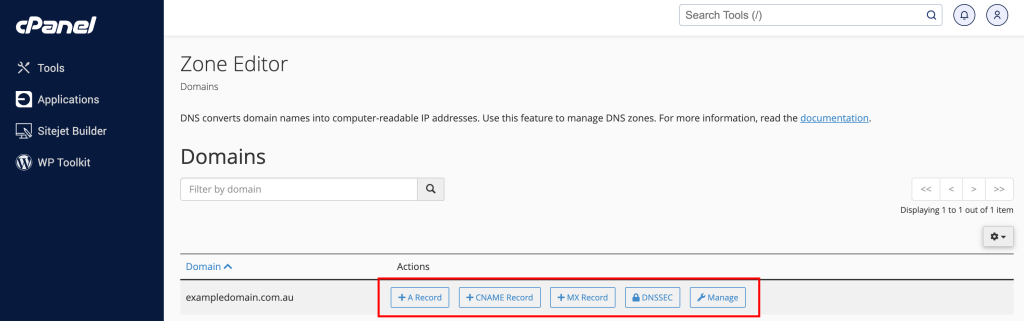
- After you click Manage, you will see your existing DNS Zone information. You can Edit existing records or use the Add Record button to add a new record.
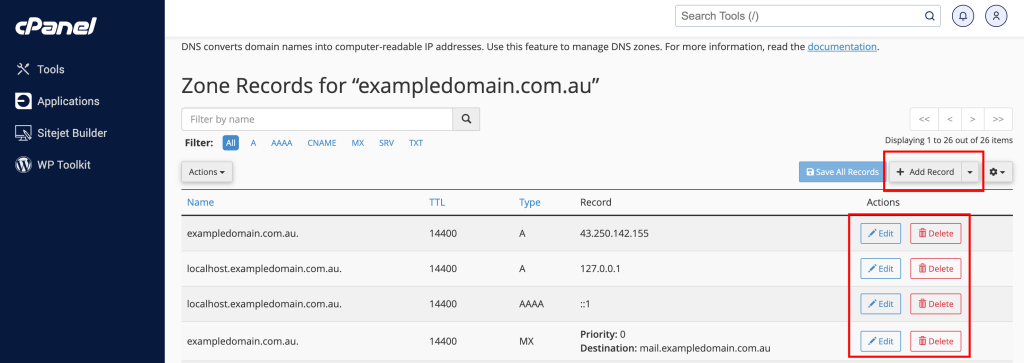
- If you select Add or Edit you’ll be prompted to complete relevant text fields or drop down options for the record type and press Save Record.
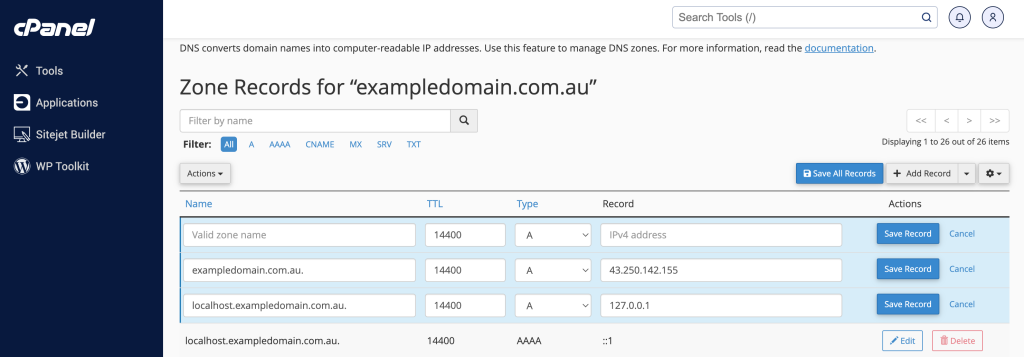
- Set your TTL and record type as required.
- It is recommended to leave the TTL 14400 unless otherwise specified.
- Enter the destination IP address or hostname accordingly.
- Click Save Record.
NOTE: When DNS records are adjusted please allow up to 24 hours for DNS to propagate.

We Are Here to Help You
Get in touch with one of our local experts at any time.