
Browse by Popular
Domain Name
- What is a domain name?Eligibility criteria for registering .AU domain namesPremium domain names explained
Web Hosting
View All
Email Hosting
- Outlook 365 (Classic) Email Setup GuideMail app setup for iOS (iPhone + iPad)Gmail (webmail) email setup

Google Workspace
- Getting Started with Google WorkspaceGoogle Workspace support resourcesTransferring an existing Google Workspace service to VentraIP
Account
- How do I reset my VIPcontrol password?How do I create a VentraIP account?How can I see who accessed my VentraIP account?

Troubleshooting
- How do I clear my browser cache?Troubleshooting a ‘500 internal server' errorTroubleshooting with a ping test
Blogging with VIPsites
In this guide, we will go over how to create and manage a blog on your VIPsites website. You can write posts, edit, draft and publish them!
How blogs are organised
VIPsites organises blogs by adding a blog page to your site as a landing page, which blog posts are then added and arranged usually as a grid. Clicking on the button under the post will take you to a subpage with the post’s content.
Blog posts are subpages of the blog page, with each blog post having its own URL. The posts are able to be sorted into categories which can also be displayed on the front page.
Add a blog page
To add a blog page:
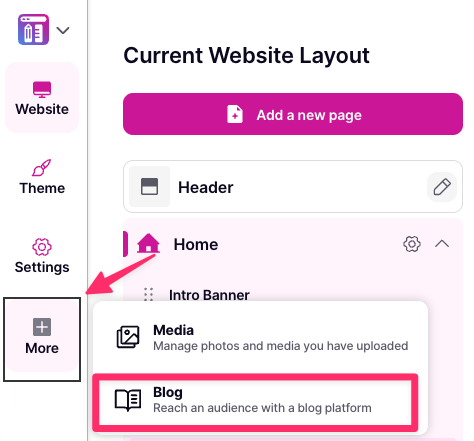
- Navigate to the Website Editor
- Click ‘More’ → ‘Blog’
- Click ‘New blog post’ on the top left
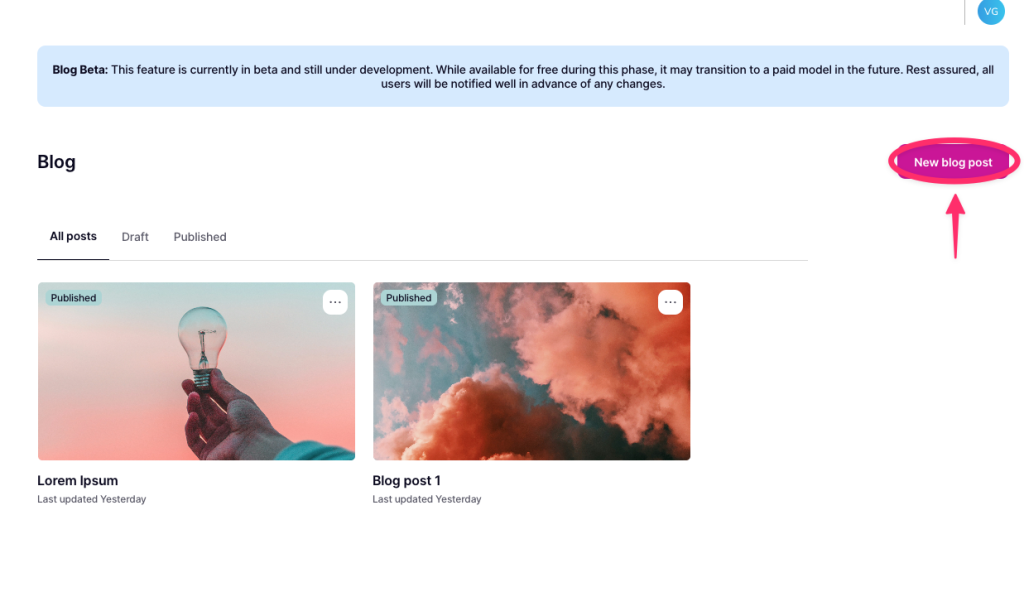
- From there, you’ll be able to enter the following:
- Blog post title
- Blog post content
- Blog post excerpt
- Featured image
- Categories
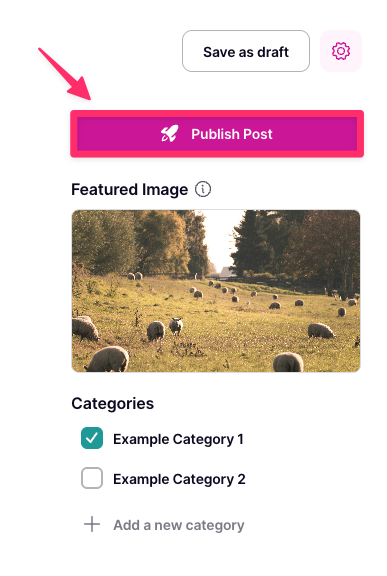
- After editing your posts content, you can either save it as a draft for later, or publish the post right away using the corresponding buttons on the top left.
Editing a post
To edit a post:
- Navigate to the Website Editor
- Click ‘More’ → ‘Blog’
- You’ll then see a list of your posts, click on the desired one you would like to edit
- From there you’ll be able to edit the posts content as desired. Once edited, click ‘Update post’.
Edit post settings
When creating/editing a post, you’re able to configure and or adjust certian post settings by clicking on the settings cog at the top right. This will allow you to:
- Change post URL: You can enter a custom URL for the post.
- Duplicate post: You can duplicate the post, if you want to take a copy or use it as a template for your next post.
- Unpublish post: Click this if you would like to unpublish the post and move it into drafts.
- Delete post: If you want to use this option, click delete post.
Categories
With blog posts you’re able to assign categories to posts to help organise your content.
Adding a category
To do this:
- Click on a post in the blog panel
- On the far right under categories, click “Add a new category” to create one.
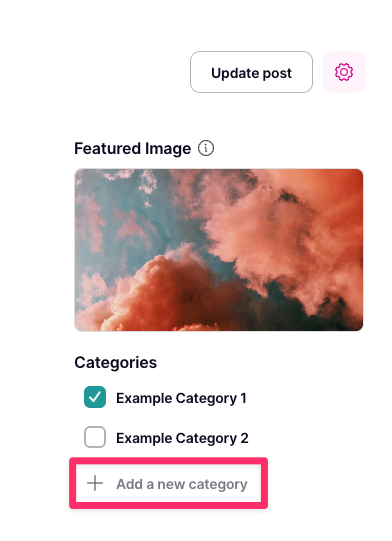
- Enter a name for the category and click ‘Add’.
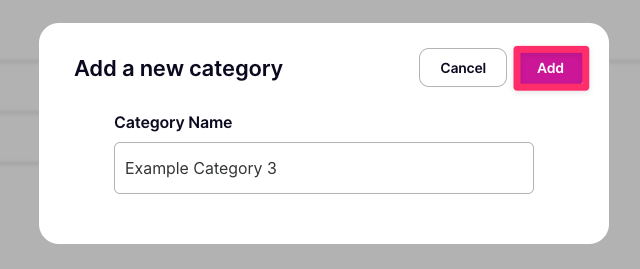
Assigning/unassigning a category
To assign/unassign a category, click on the checkbox next to the category you would like to assign/unassign the post to.
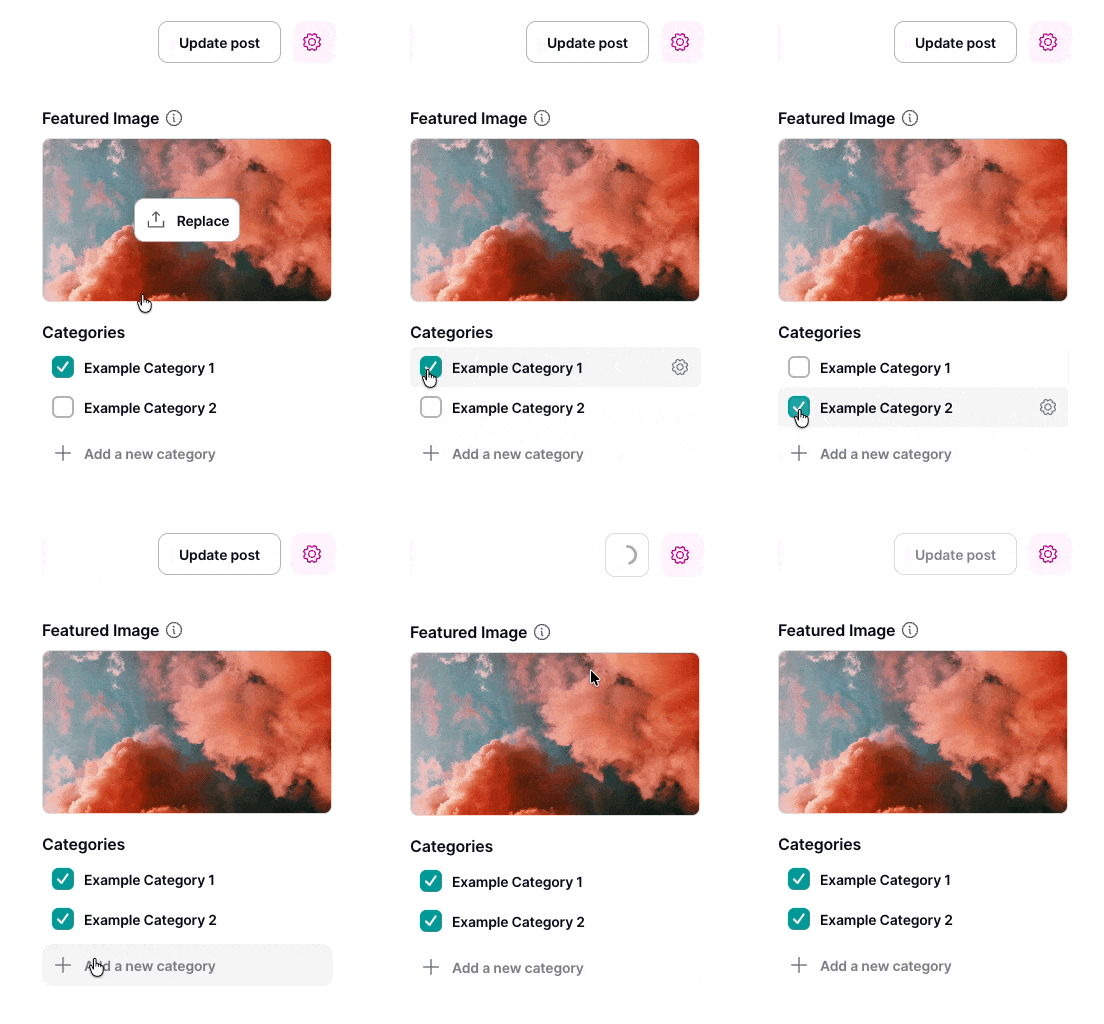 You are abel to assign a post to multiple categories to organise posts with similar topics.
Removing a category
To remove a category, click on the settings cog and click ‘Delete category’.
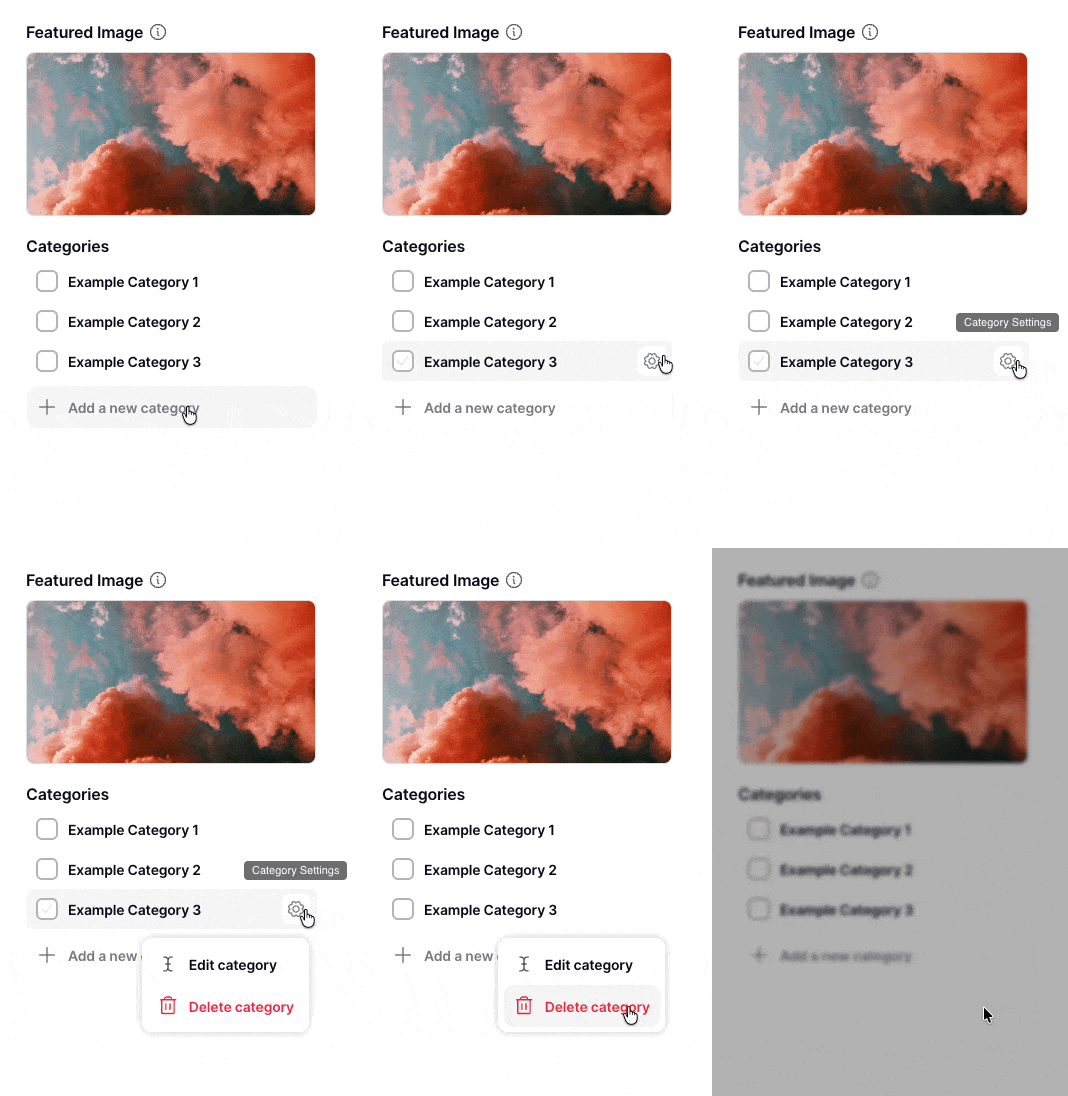
Drafting or publishing
When you’re done editing a post, you have the option to:
- Preview Post: Click on the settings cog and click Preview Post to see a live preview of how it looks before publishing.
- Draft: Click “Save as draft” to save the post and put it aside for later.
- Publish Post: Click Publish Post if you’re done editing and ready for everyone to see.