


Support Centre
Find the answers to your questions and get the support you need with the VentraIP help centre.
Browse by Popular

Domain Name
- What is a domain name?Eligibility criteria for registering .AU domain namesPremium domain names explained

Web Hosting
View All
Email Hosting
- Outlook 365 (Classic) Email Setup GuideMail app setup for iOS (iPhone + iPad)Gmail (webmail) email setup

Google Workspace
- Getting Started with Google WorkspaceGoogle Workspace support resourcesTransferring an existing Google Workspace service to VentraIP

Account
- How do I reset my VIPcontrol password?How do I create a VentraIP account?How can I see who accessed my VentraIP account?

Troubleshooting
- How do I clear my browser cache?Troubleshooting a ‘500 internal server' errorTroubleshooting with a ping test
Configuring Email Forwarding in Microsoft 365
This guide will go over configuring email forwarding for a user account.
Forward all emails for a user through the Exchange Admin Center
- Login to the Exchange Admin center as user with the Exchange admin or Global Admin role.
- Click Recipients → Mailboxes and select the user you would like to forward mail for.
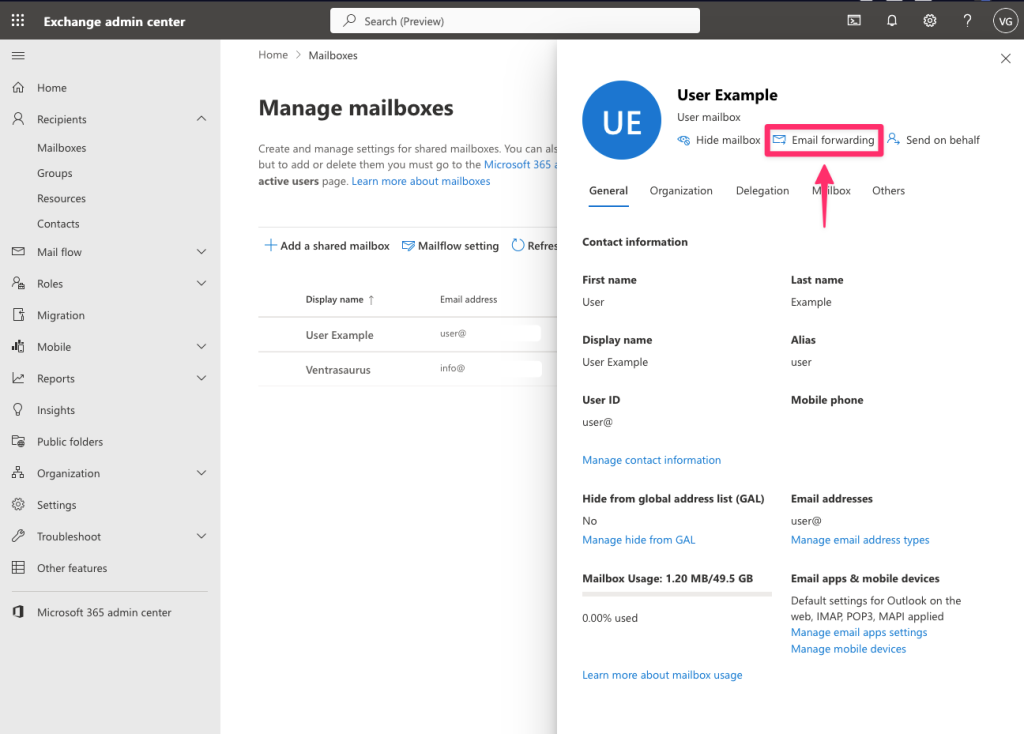
- Click ‘Email Forwarding’ and select ‘Forward all emails sent to this mailbox’.
- You can then either forward all mail to an internal email account, or an external email account.
- Once you have entered or selected the email account you would like the emails to forward to, click on ‘Save’.
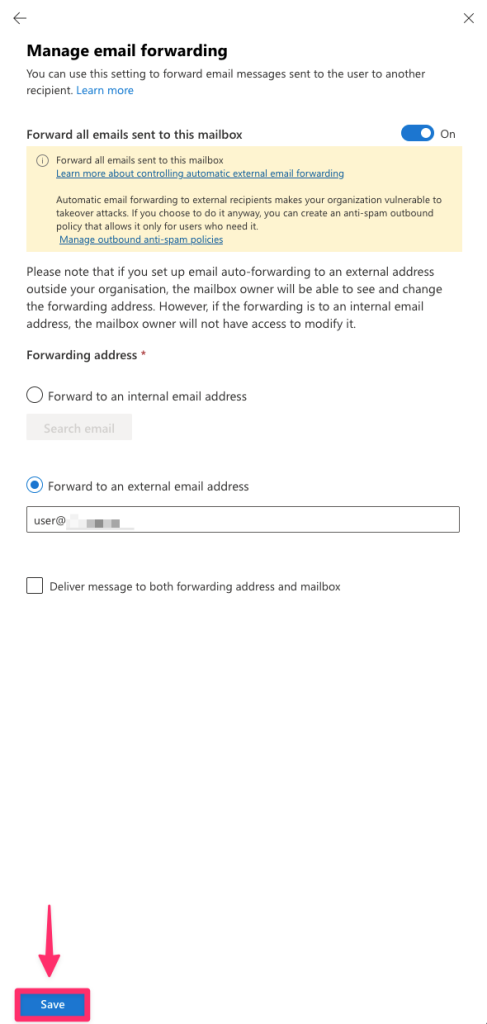
Note: If you set up email forwarding to an external address outside your organisation, the mailbox owner will be able to see and change the forwarding address.
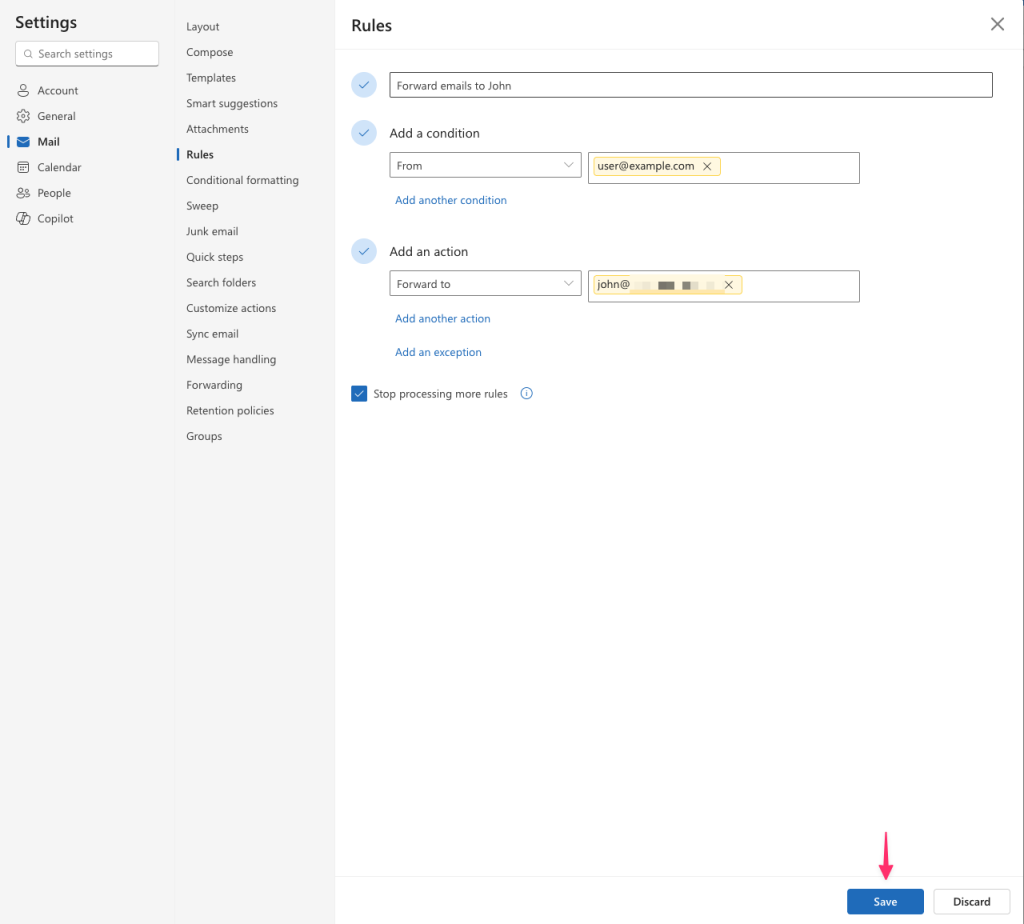
Forwarding specific emails through Outlook
If you want to configure forwarding as the user account, or only forward specific emails, this is done through (new) Outlook or Outlook for Web. To do this:
- Open the Outlook app, or login to Outlook for Web
- Click on ‘File’ → ‘Settings’
- Under Rules, click ‘Add Rule’. From there, you’ll be able to choose what conditions emails get forwarded.
- Name: Choose a name for the forwarder.
- Add a condition: Select what gets forwarded (e.g, from a specific sender, or if the message contains a keyword).
- Add an Action: Select ‘Forward to’ and enter the recipients email account.
- After you have configured the rule, click on ‘Save’.
An example forwarding rule is shown below:

We Are Here to Help You
Get in touch with one of our local experts at any time.