


Browse by Popular

Domain Name
- What is a domain name?Eligibility criteria for registering .AU domain namesPremium domain names explained

Web Hosting
View All
Email Hosting
View All
Google Workspace
- Getting Started with Google WorkspaceGoogle Workspace support resourcesTransferring an existing Google Workspace service to VentraIP

Account
- How do I reset my VIPcontrol password?How do I create a VentraIP account?How can I see who accessed my VentraIP account?

Troubleshooting
- How do I clear my browser cache?Troubleshooting a ‘500 internal server' errorTroubleshooting with a ping test
How to purchase extra Disk Space for a NetVirtue shared hosting service
Step 1 – Login to nvArea (https://nvarea.com.au)
Step 2 – In the menu to the left of nvArea, click Hosting Services to open the drop-down menu and then click Manage Hosting
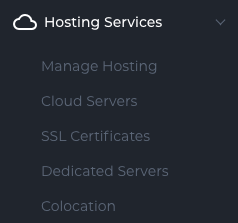
After you click Manage Hosting, you will see a list of your active services.
Step 3 – Click on the service name open the Details for the service you will be working with.
Step 4 – Click on the “Upgrade/Downgrade option from the top menu.
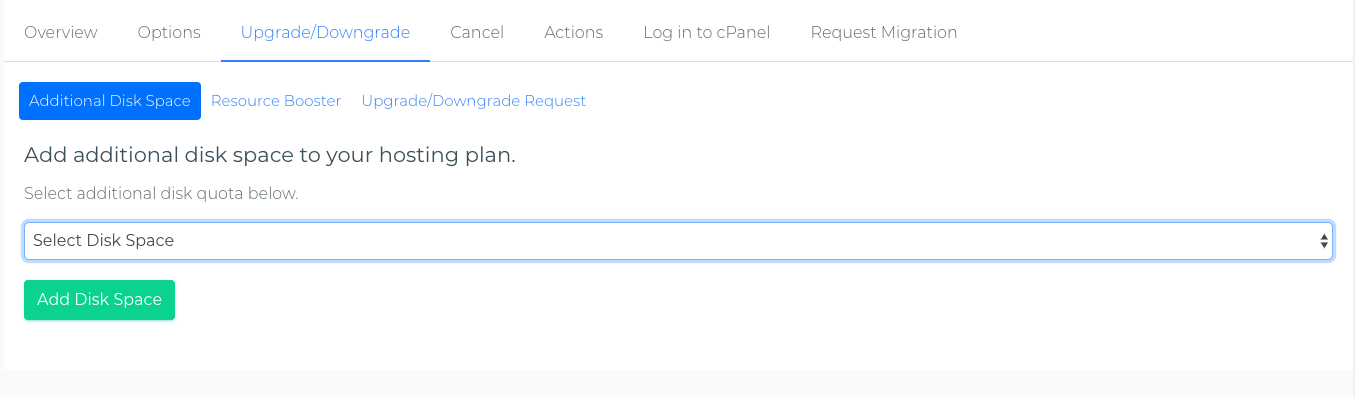
Step 5 – Choose the desired disk space upgrade from the dropdown and click the “Add Disk Space” button.
Your extra disk space will now be added to your service.
An invoice should now have been sent to your email address on file for the extra Disk Space.
This invoice will need to be paid before the due date or your service may be suspended for non-payment.
