


Browse by Popular

Domain Name
- What is a domain name?Eligibility criteria for registering .AU domain namesPremium domain names explained

Web Hosting
View All
Email Hosting
View All
Google Workspace
- Getting Started with Google WorkspaceGoogle Workspace support resourcesTransferring an existing Google Workspace service to VentraIP

Account
- How do I reset my VIPcontrol password?How do I create a VentraIP account?How can I see who accessed my VentraIP account?

Troubleshooting
- How do I clear my browser cache?Troubleshooting a ‘500 internal server' errorTroubleshooting with a ping test
Everything about WordPress Multisite
Why would I want to set up Multisite?
Sometimes you might want the ability to share resources between or more easily manage multiple websites. WordPress’s Multisite functionality allows you to do this using one set of credentials, rather than having separate logins for each individual site. Multisite also uses a smaller amount of Disk Space compared to having a separate WordPress installation for each website.
Some examples of businesses or organizations that might benefit from using the multi-site feature are:
- A business that needs multiple websites for different locations/branches
- Government or government department that might want multiple websites for different locations or regions
- A network of blog websites running on multiple sub-domains
WordPress Multisite requirements and recommendations
- Enough resources to handle a large website or multiple websites, (you may need to consider upgrading your hosting)
- You already have a WordPress website setup
The sub-domain structure
WordPress allows you to setup multi-site in two different ways, using a sub-domain or using a sub-folder.
- Sub-domain: yourdomain.com, blog.yourdomaine.com, site1.yourdomain.com
- Sub-directory: yourdomain.com/site1 , yourdomain.com/blog
If you want to setup sub-domains, you will need to create those sub-domains inside cPanel before proceeding.
Installing a new Multisite WordPress (subdirectory mode only)
You can use Installatron to create a new WordPress with Multisite enabled – however this method will automatically enable subdirectory mode, which means all child sites will be a directory under your main domain (eg yourdomain.com/site1, yourdomain.com/site2).
- In cPanel, navigate to Installatron Apps Installer and choose WordPress from the applications list.
- Click install this application, and be sure to select “Yes…” on Enable Multi-site near the bottom of this page and then click +Install. This will create a WordPress installation for your first website.
- Log in with your admin details on the Network Admin to get started! (yourdomain.com/wp-admin/network)
Converting an existing WordPress site to Multisite
- Open your website’s wp-config.php file in cPanel File Manager or via a FTP program of your choice.
- Add the following code underneath the line that starts with define (‘WP_DEBUG’, false);
define('WP_ALLOW_MULTISITE', true); - Save the config file and head back over to your WordPress Admin Dashboard.
- Navigate to Tools > Network Setup.
- Fill this page out to your desired preferences and click Install.
- Once installation is finished, you will then be shown a page titled Enabling the Network with some amendments you will need to make to your wp-config.php and .htaccess files. Add these bits of code to these files as you did in earlier steps.
Creating new websites
- From the Network Admin (yourdomain.com/wp-admin/network) dashboard, click Create a New Site (found in the Right Now box).
- Choose your desired subdomain/subdirectory, site title and admin email. Each site will need its own admin account which will be separate from the network admin (also known as Super Admin), but additional users can be shared throughout each site.
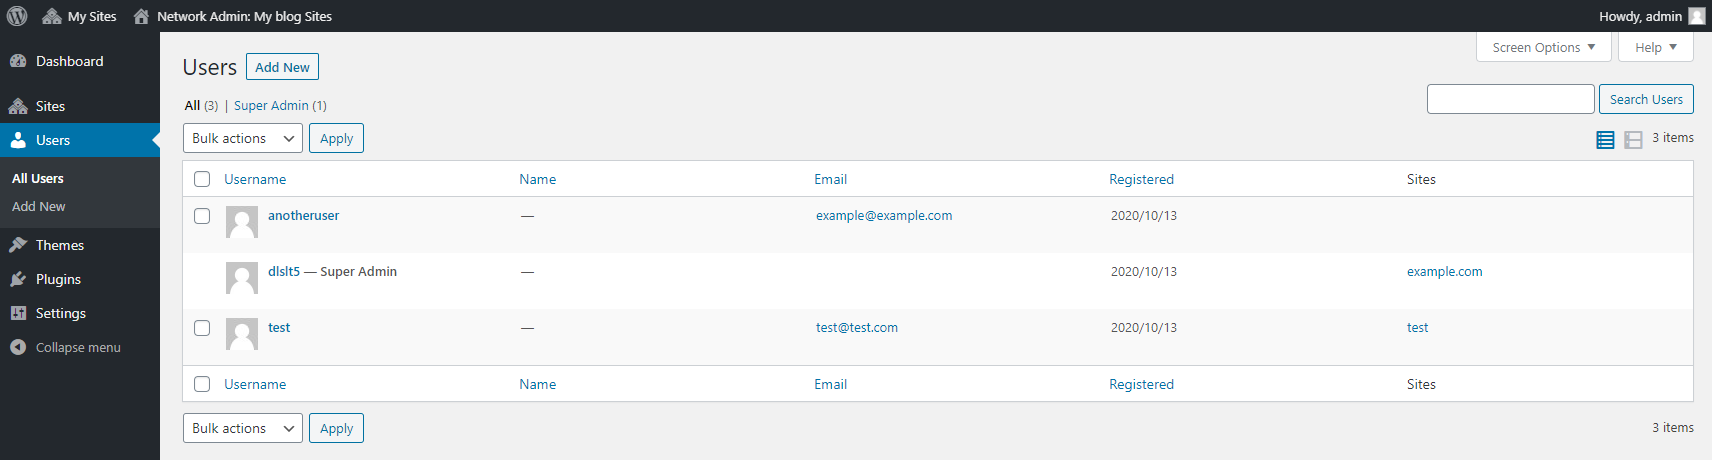
Managing your users
From the Users section of the Network Admin, you can create, remove and manage users for your network. The list here will display all users across each site. Adding or modifying a user here will not assign them to a site.
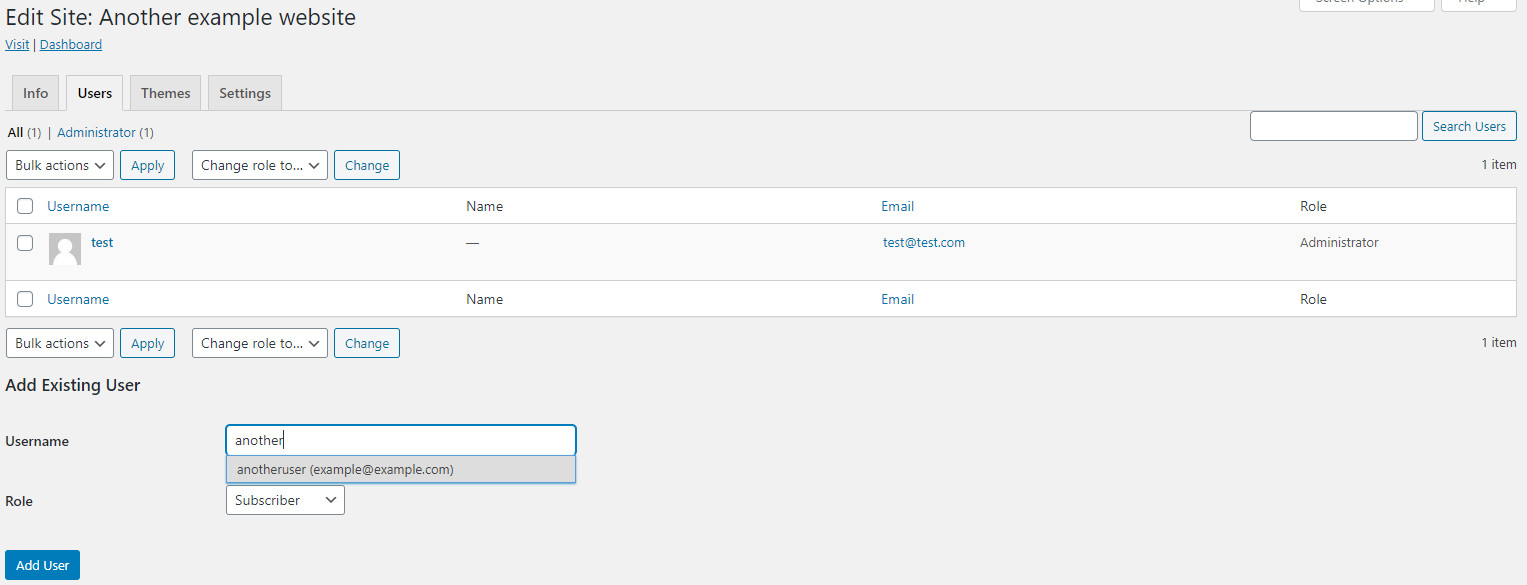
You can add any existing user to another site from the Sites section of the Network Admin Dashboard. Simply click edit under the site you’d like to add the user to, then click the Users tab.
Managing your sites
Ultimately, your sites are best managed through Network Admin > Sites before that site’s WordPress Admin. Clicking edit under a site in the list here allows you to manage its users, themes and limitations. You can quickly access the WordPress Admin Dashboard for each of these sites from the Network Admin.
The Users tab allows you to add, remove and modify users on a specific site.
The Themes tab allows you to limit what themes that this site has access to by enabling/disabling them. See ‘Managing your themes and plugins’ below in this article for more information on adding themes to your network.
The Settings tab allows you to change the site title and admin email, as well as set a multitude of limitations to the site in question. These settings are far more down the advanced path of network management – if you’re not sure what any of this means, you can come back to this later if and once the need arises.
Managing your themes and plugins
The Themes and Plugins tabs in the Network Admin Dashboard are where you need to add any plugins or themes to the network so that they become available to install on your individual sites. You cannot add a plugin or theme to the network from an individual site’s WordPress Admin Dashboard.
Any plugin or theme that you Network Disable or Network Enable from here will affect availability on each site.
You can also install a plugin to the mu-plugins folder (found in your site’s files) to force that plugin to be enabled on all sites across the network. This could be useful if you want to set a standard for security or continuity between sites.
Other features
There are some other neat features that can be found in the Settings of the Network Admin Dashboard. Here’s just a few useful ones we found!
- Allow new registrations This feature, when enabled, allows for the creation of new sites on your network. This could be useful if you’re trying to create a community network or something similar to a ‘wiki’ site.
- Add New Users Disabled by default – when enabled this allows the admin account of a specific site to add new users without requiring access to the Network Admin Dashboard.
- Banned Names, Limited Email Registrations, and Banned Email Domains Ban users from being added to your network using defined terms. This is useful if you wish to use your network in an internal fashion.
- New Site Settings Here you can set up templates for messages sent to users when signing up, creating their first page/post/comment and more!
- Max upload file size An incredibly useful feature to ensure your users are not uploading massive files that will ultimately contribute to your hosting account’s Disk Usage.
- Default editor for all sites You can force your sites to use Classic Editor instead of Block Editor on all sites to achieve a level of consistency between sites (as Classic Editor limits what can be put on a page compared to Block Editor).
More information
For a more in-depth look at WordPress Multisite, check out the official support page found here on WordPress.org.
