


Browse by Popular

Domain Name
- What is a domain name?Eligibility criteria for registering .AU domain namesPremium domain names explained

Web Hosting
View All
Email Hosting
View All
Google Workspace
- Getting Started with Google WorkspaceGoogle Workspace support resourcesTransferring an existing Google Workspace service to VentraIP

Account
- How do I reset my VIPcontrol password?How do I create a VentraIP account?How can I see who accessed my VentraIP account?

Troubleshooting
- How do I clear my browser cache?Troubleshooting a ‘500 internal server' errorTroubleshooting with a ping test
Adding a remote backup location to Softaculous
Creating a backup location
To begin, you need to create a new backup location in Softaculous, the steps to do this are:
- Log in to VIPcontrol.
- Navigate to My Services > cPanel Hosting.
- Click on the cPanel button.
- Click on Softaculous Apps Installer under Software
- Click on the settings icon to the top right of the page (the one that looks like a spanner).

- Click Add Backup Location.
From there, you need to select the type of backup location you want to set up. Here is what you will need for each type of backup location.
Dropbox and Google Drive
You will be prompted to provide authorization to Softaculous to access your Google Drive or Dropbox account, which simply requires you to input your login details.
FTP, SFTP, FTPS, WebDAV
This option will ask you for the following information:
- Server Hostname
- Port Number
- Username
- Password
- Authentication Method (SFTP only)
- Backup Location/Path
If you’re using a 3rd party FTP or WebDAV service, you will need to ask the company that provides you with that service for the required information.
Adding the new backup location
Once you have created your new backup location, you will need to configure your website/application to use it. The steps to do this are:
- Log in to VIPcontrol.
- Navigate to My Services > cPanel Hosting.
- Click on the cPanel button.
- Click on Softaculous Apps Installer under Software.
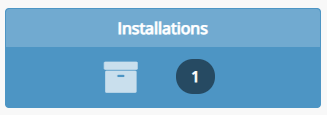
- Click the blue Installations box.
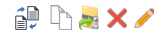
- Click on the settings icon next to the installation (pencil icon).
- Click on the drop-down menu next to Backup Location and select your new backup location.
- Make sure you have set a backup schedule under Automated Backups.
- At the bottom of the page, click Save Installation Details.
