


Browse by Popular

Domain Name
- What is a domain name?Eligibility criteria for registering .AU domain namesPremium domain names explained

Web Hosting
View All
Email Hosting
View All
Google Workspace
- Getting Started with Google WorkspaceGoogle Workspace support resourcesTransferring an existing Google Workspace service to VentraIP

Account
- How do I reset my VIPcontrol password?How do I create a VentraIP account?How can I see who accessed my VentraIP account?

Troubleshooting
- How do I clear my browser cache?Troubleshooting a ‘500 internal server' errorTroubleshooting with a ping test
Outlook Email Software Setup – 2013 to 2019
Are you looking to update your account settings instead? Find our guide for that here.
Before setting up email on your device(s), you will need to have purchased cPanel shared hosting and set up any required mailbox(es) for your domain OR purchased and configured dedicated email hosting mailbox(es) for your domain.
Once you’ve created a mailbox using one of these methods, you will be able to retrieve server settings from cPanel. If you’re using Dedicated Email Hosting, this will be in the welcome email we send out once your mailbox is configured.
Setting up your account for the first time
1. Open Outlook and click File at the top left.
 2. Click on Account Settings to reveal the dropdown menu, then Account Settings.
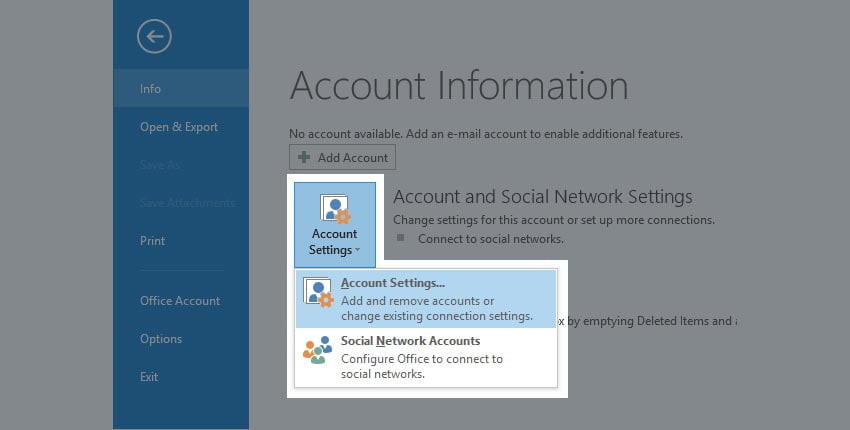
3. You should be presented with the Account Settings page. Click New.

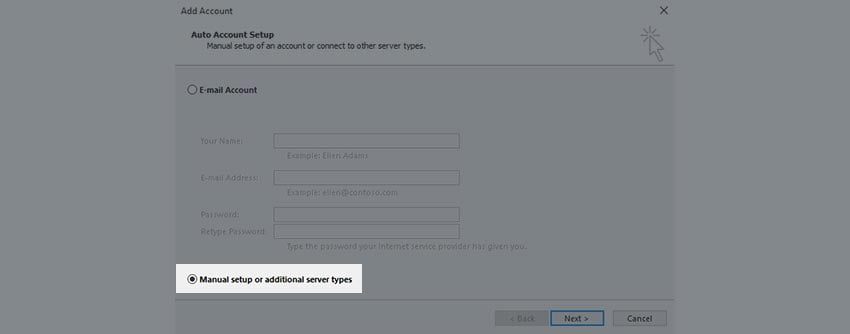
4. Select the Manual setup or additional server types option. This allows us to enter the server information manually.
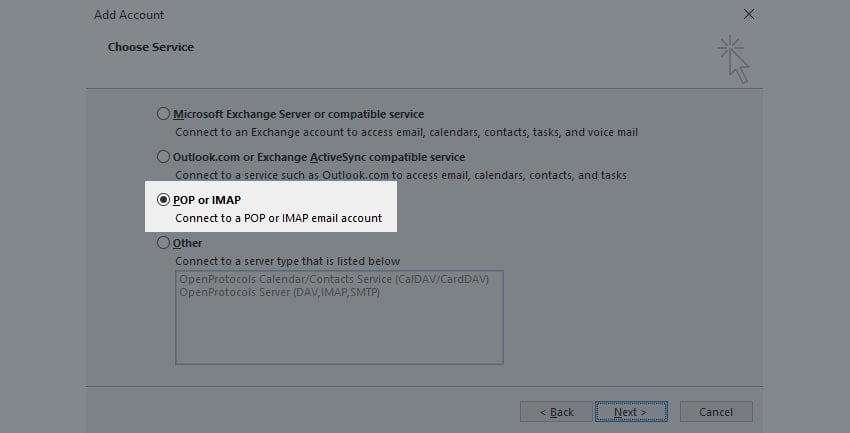
5. Choose POP or IMAP (the third option) when it prompts you for the Service.
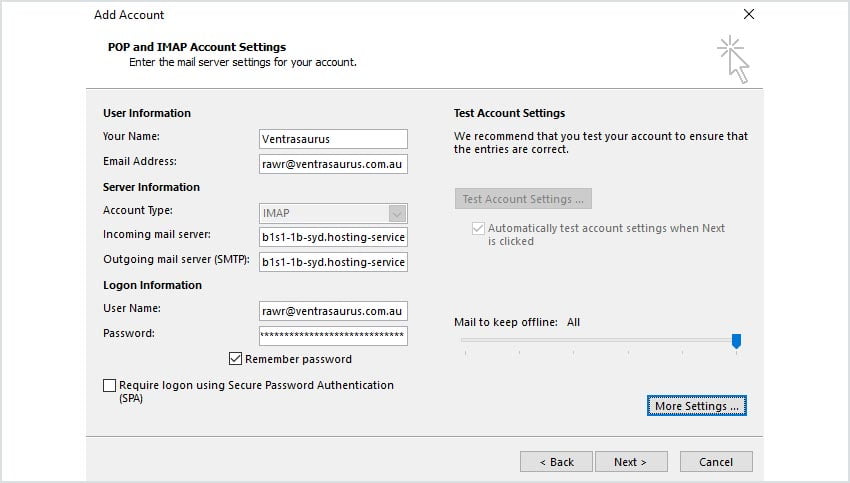
6. Enter your details.
- Your Name: This is what will display as the ‘From’ name on your emails (e.g. John Smith)
- Email Address: This is your full email address (e.g. john@exampledomain.com.au)
- Account Type: Select either POP3 or IMAP (Click here for more information on this choice)
- Incoming Mail Server: This will be the server hostname. (Use this guide to retrieve this information)
- Outgoing Mail Server: This should be identical to the above.
- User Name: This is your full email address (e.g. john@exampledomain.com.au).
- Password: The password for your email account, which you would have selected when you created the email account.
- Remember Password: You can tick this if desired. If you don’t, you will need to log in every time.
Once you’ve entered your details, click More Settings.
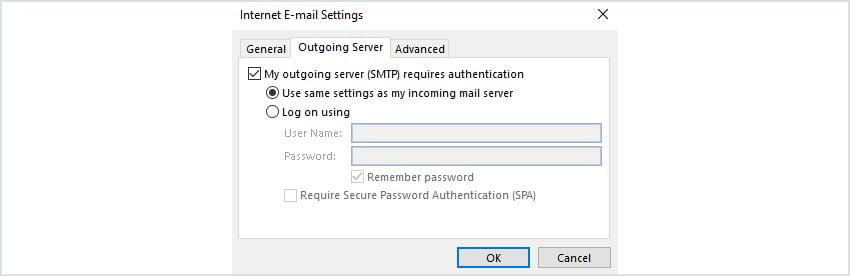
7. Click Outgoing Server, then tick the box which says My outgoing server (SMTP) requires authentication.
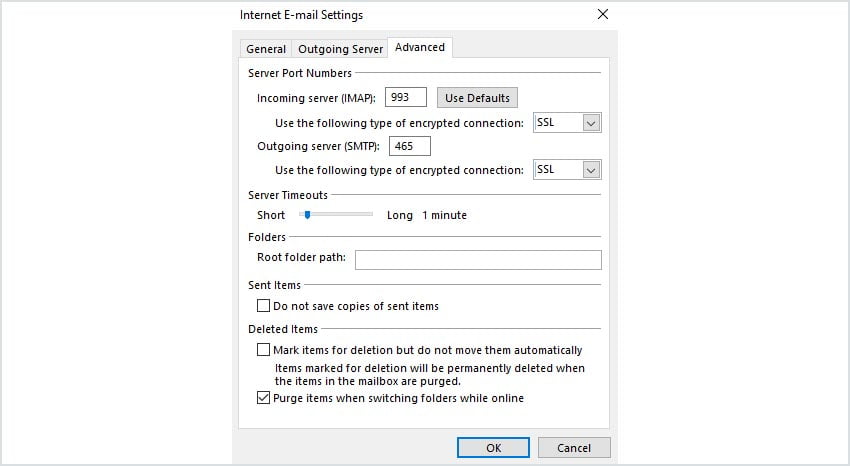
8. Click Advanced, then enter the port numbers. If you’re using IMAP, it’s 993. For POP3, it’s 995. Choose SSL in both dropdown boxes, then enter 465 for the SMTP port.
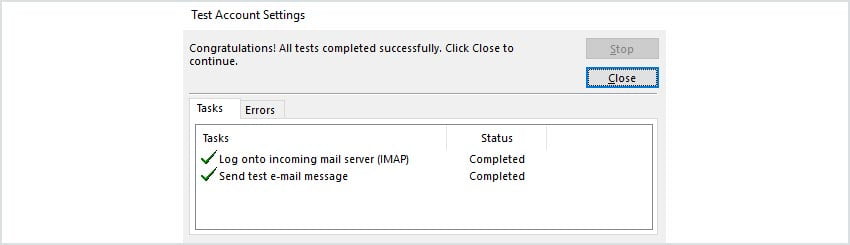
9. Click Ok, then click Next. Outlook should test your settings to make sure that they work correctly. You should get two ticks. Click Close.
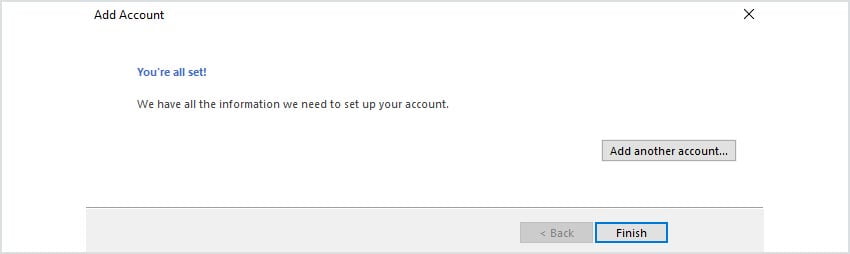
10. Click Finish to dismiss the Add Account Wizard.
11. Click Close to the final box, then begin sending and receiving emails!

Still, having issues getting set up?
Our support on issues using this software is limited – we’re happy to verify you’ve put everything in the right place. Please submit an eTicket to our technical support team with screenshots of the configurations you applied per this article, and we will let you know if anything has been missed.
Beyond this, you will need to follow our earlier suggestion of consulting the internet or looking into the vendor’s knowledge base. Click here for Microsoft Office Support.
