

Browse by Popular

Domain Name
- What is a domain name?Eligibility criteria for registering .AU domain namesPremium domain names explained

Web Hosting
View All
Email Hosting
- Outlook 365 (Classic) Email Setup GuideMail app setup for iOS (iPhone + iPad)Gmail (webmail) email setup

Google Workspace
- Getting Started with Google WorkspaceGoogle Workspace support resourcesTransferring an existing Google Workspace service to VentraIP

Account
- How do I reset my VIPcontrol password?How do I create a VentraIP account?How can I see who accessed my VentraIP account?

Troubleshooting
- How do I clear my browser cache?Troubleshooting a ‘500 internal server' errorTroubleshooting with a ping test
Outlook for Mac Setup
This guide explains how to set up your email in Outlook on macOS. These instructions apply to both cPanel and Dedicated Email Hosting accounts.
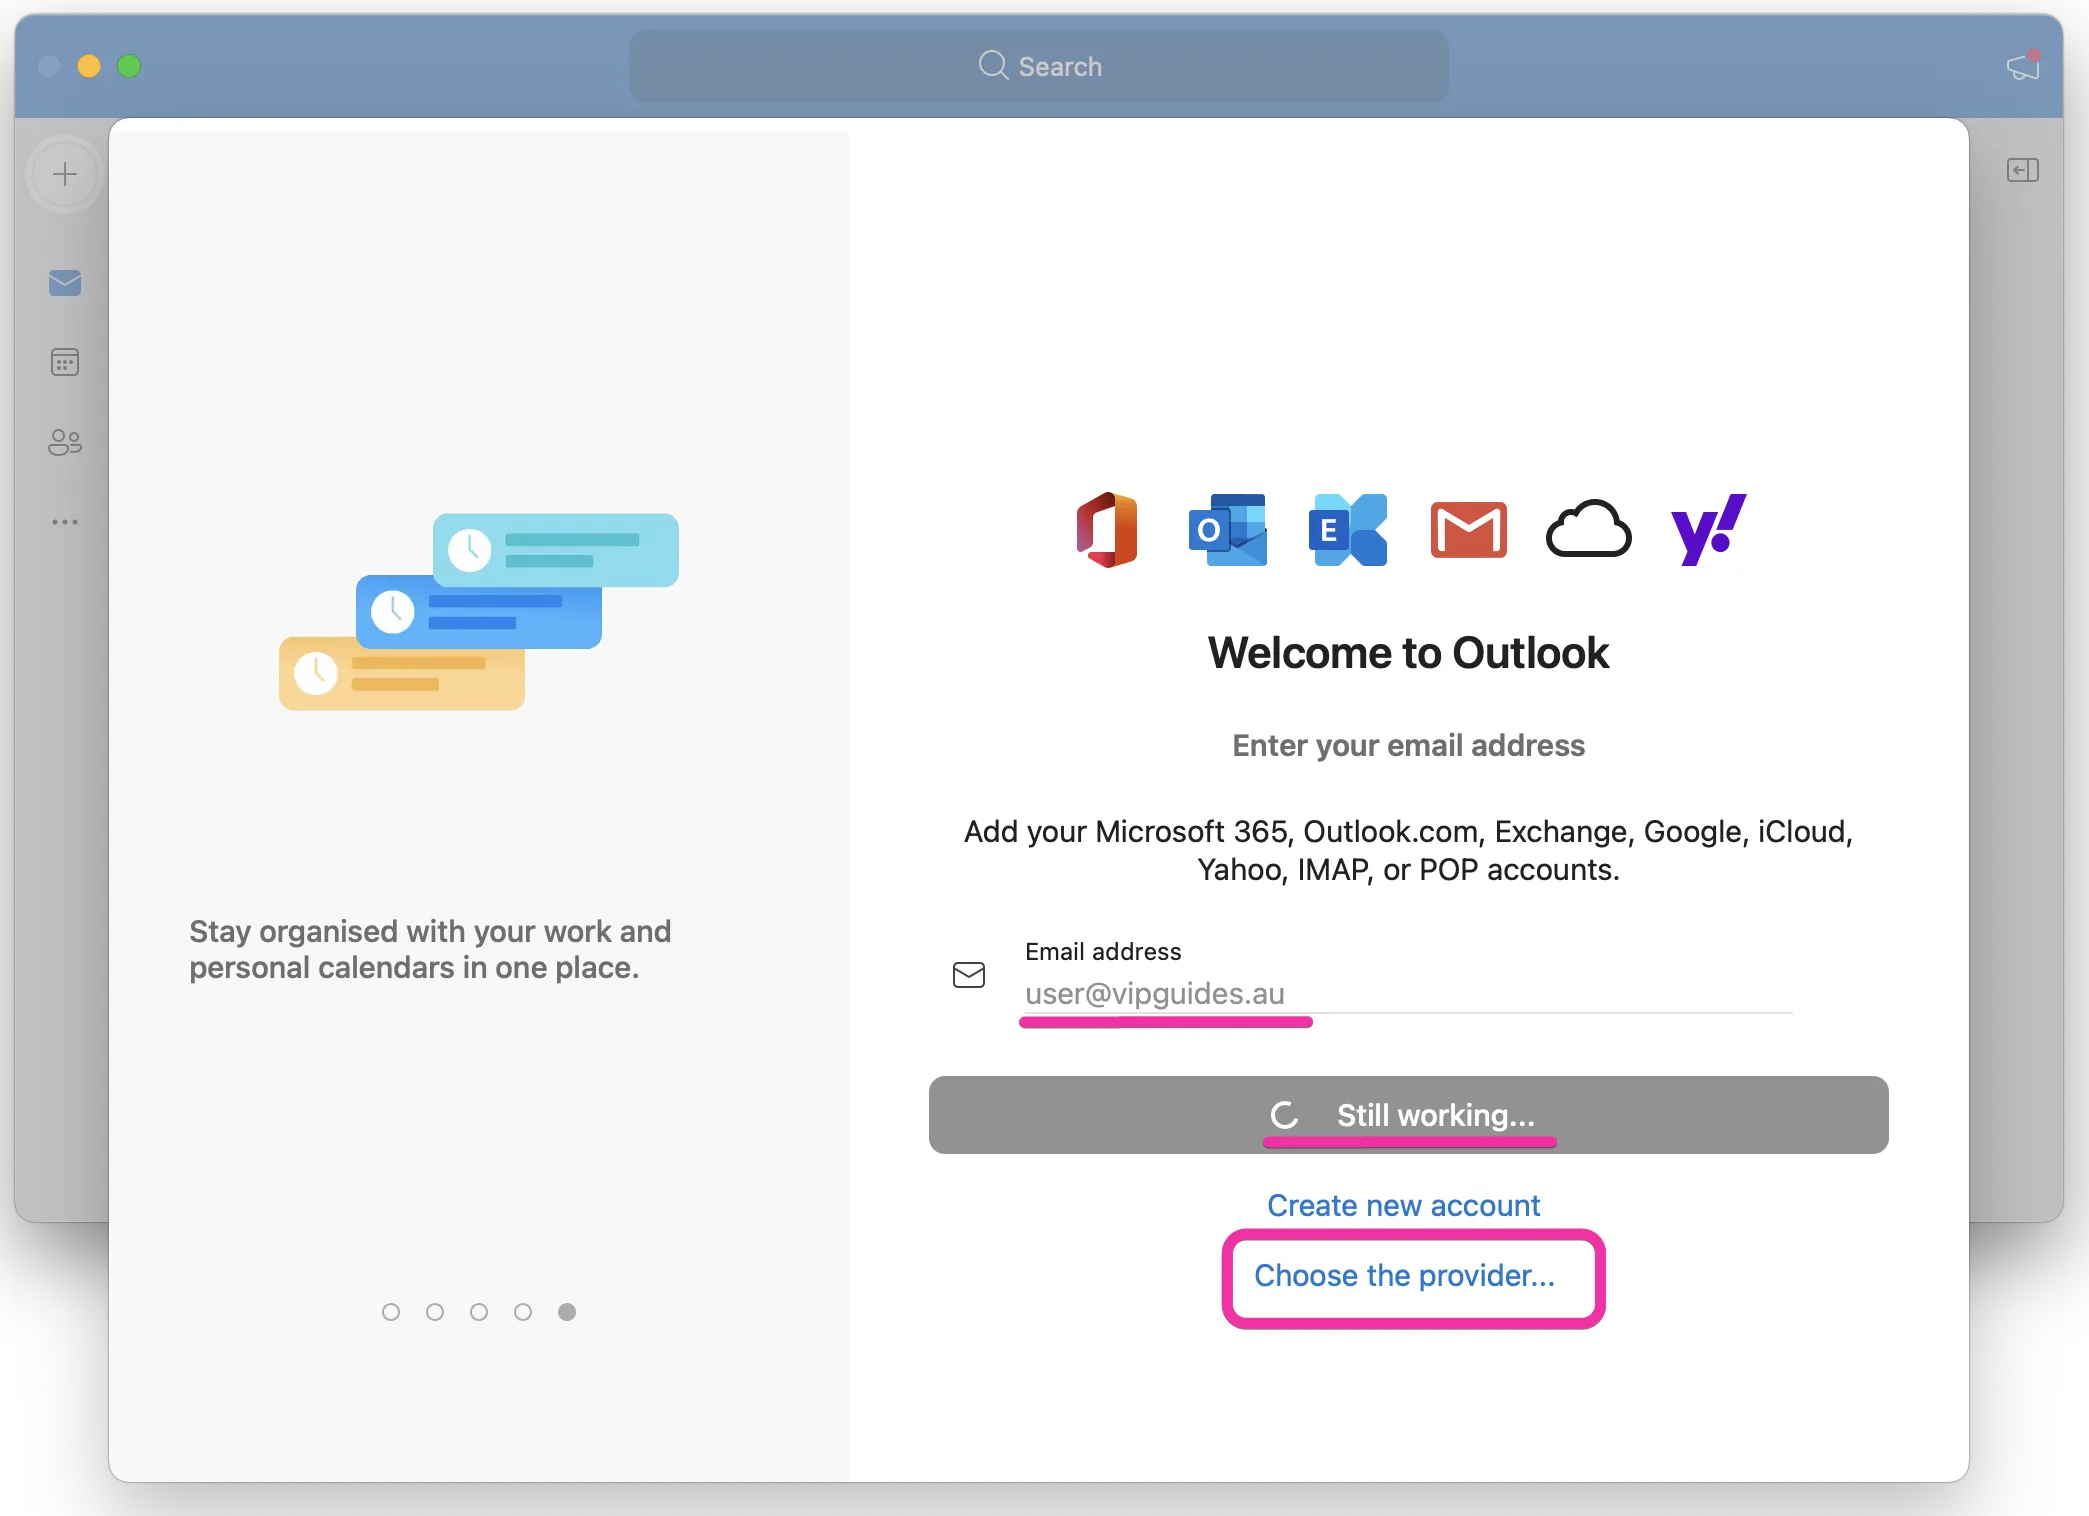
1. Open Outlook and Enter Your Email Address
- Click ‘Continue’
- Click ‘Choose the provider…’
Note: If you already have an account in Outlook and are adding another account, with Outlook open, click ‘Outlook’ on the Top Bar of your Mac (just next to the Apple Icon), then click Settings → Accounts → Add Account
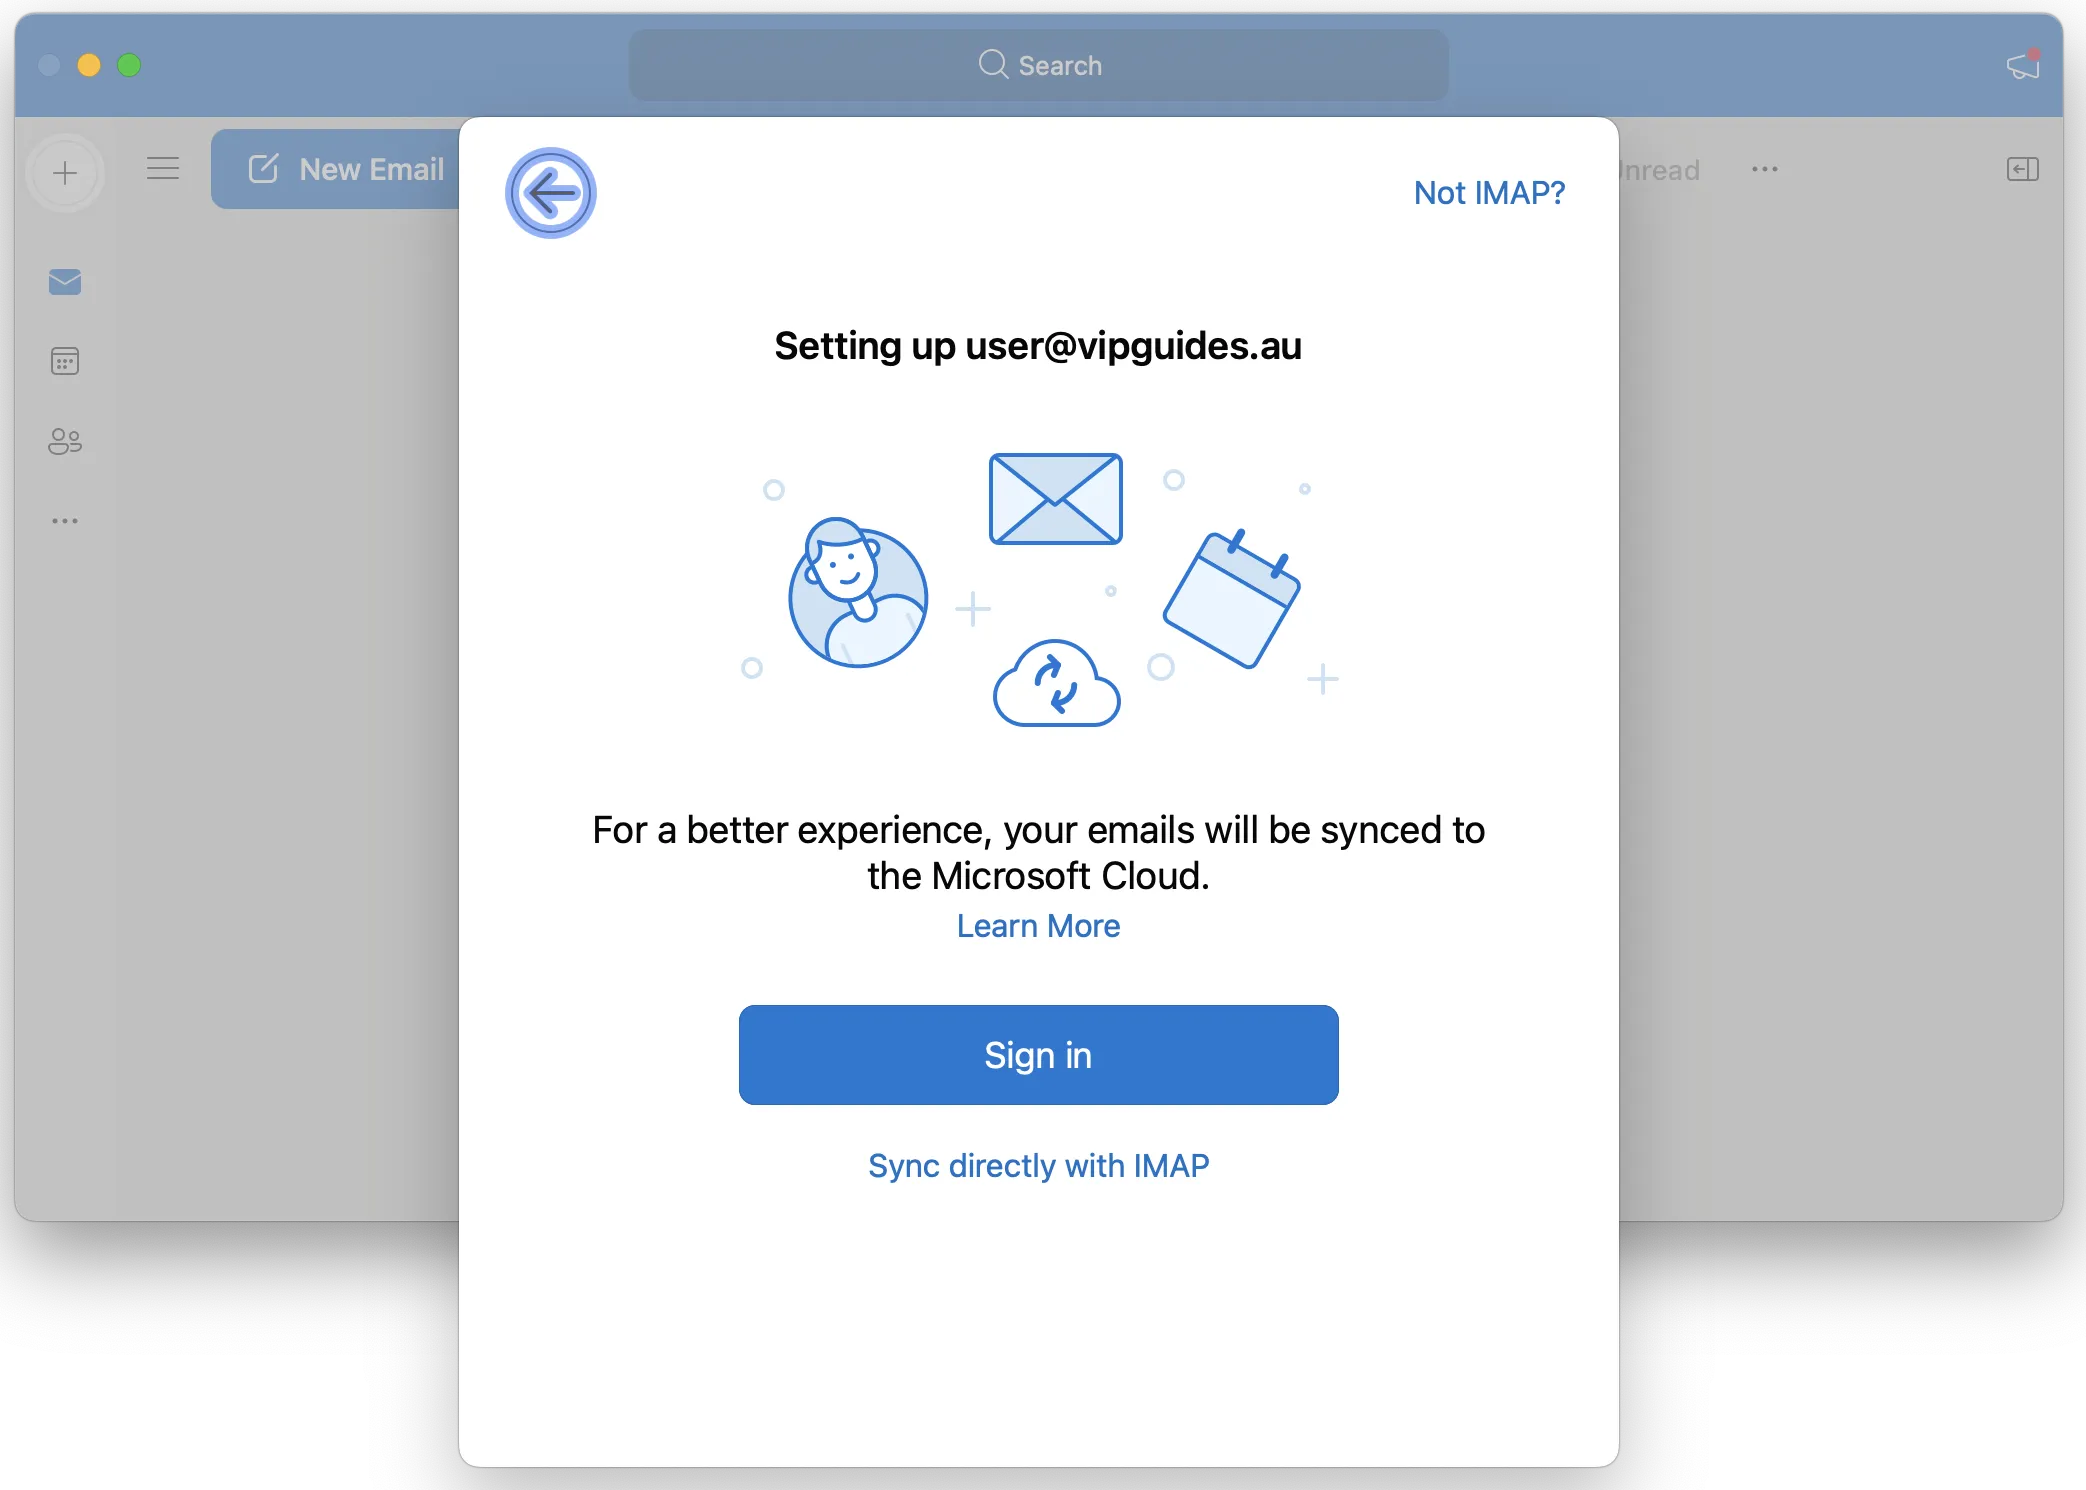
2. Click IMAP and Choose Sync Option
- If you have a Microsoft Account and want to sync your emails with Microsoft, select ‘Sign In’ and proceed
- If you do not have a Microsoft Account or do not wish to sync your emails with Microsoft, select ‘Sync directly with IMAP’

3. Enter IMAP/SMTP Server Settings
IMAP Settings
- Email Address: Enter your email (e.g., user@vipguides.au)
- IMAP Username: Enter your email (e.g., user@vipguides.au)
- IMAP Password: Your email password
- IMAP Incoming Server:
- Dedicated Email Hosting: ventraip.email
- cPanel Email Hosting: mail.yourdomain.com (replace with your actual domain)
- Port: 993
- Enable ‘Use SSL to connect’
SMTP Settings
- SMTP Username: Enter your email (e.g., user@vipguides.au)
- SMTP Password: Your email password
- SMTP Outgoing Server:
- Dedicated Email Hosting: ventraip.email
- cPanel Email Hosting: mail.yourdomain.com (replace with your actual domain)
- Port: 465
- Enable ‘Use SSL to connect’
- Enable ‘Show Advanced Settings’ ✅
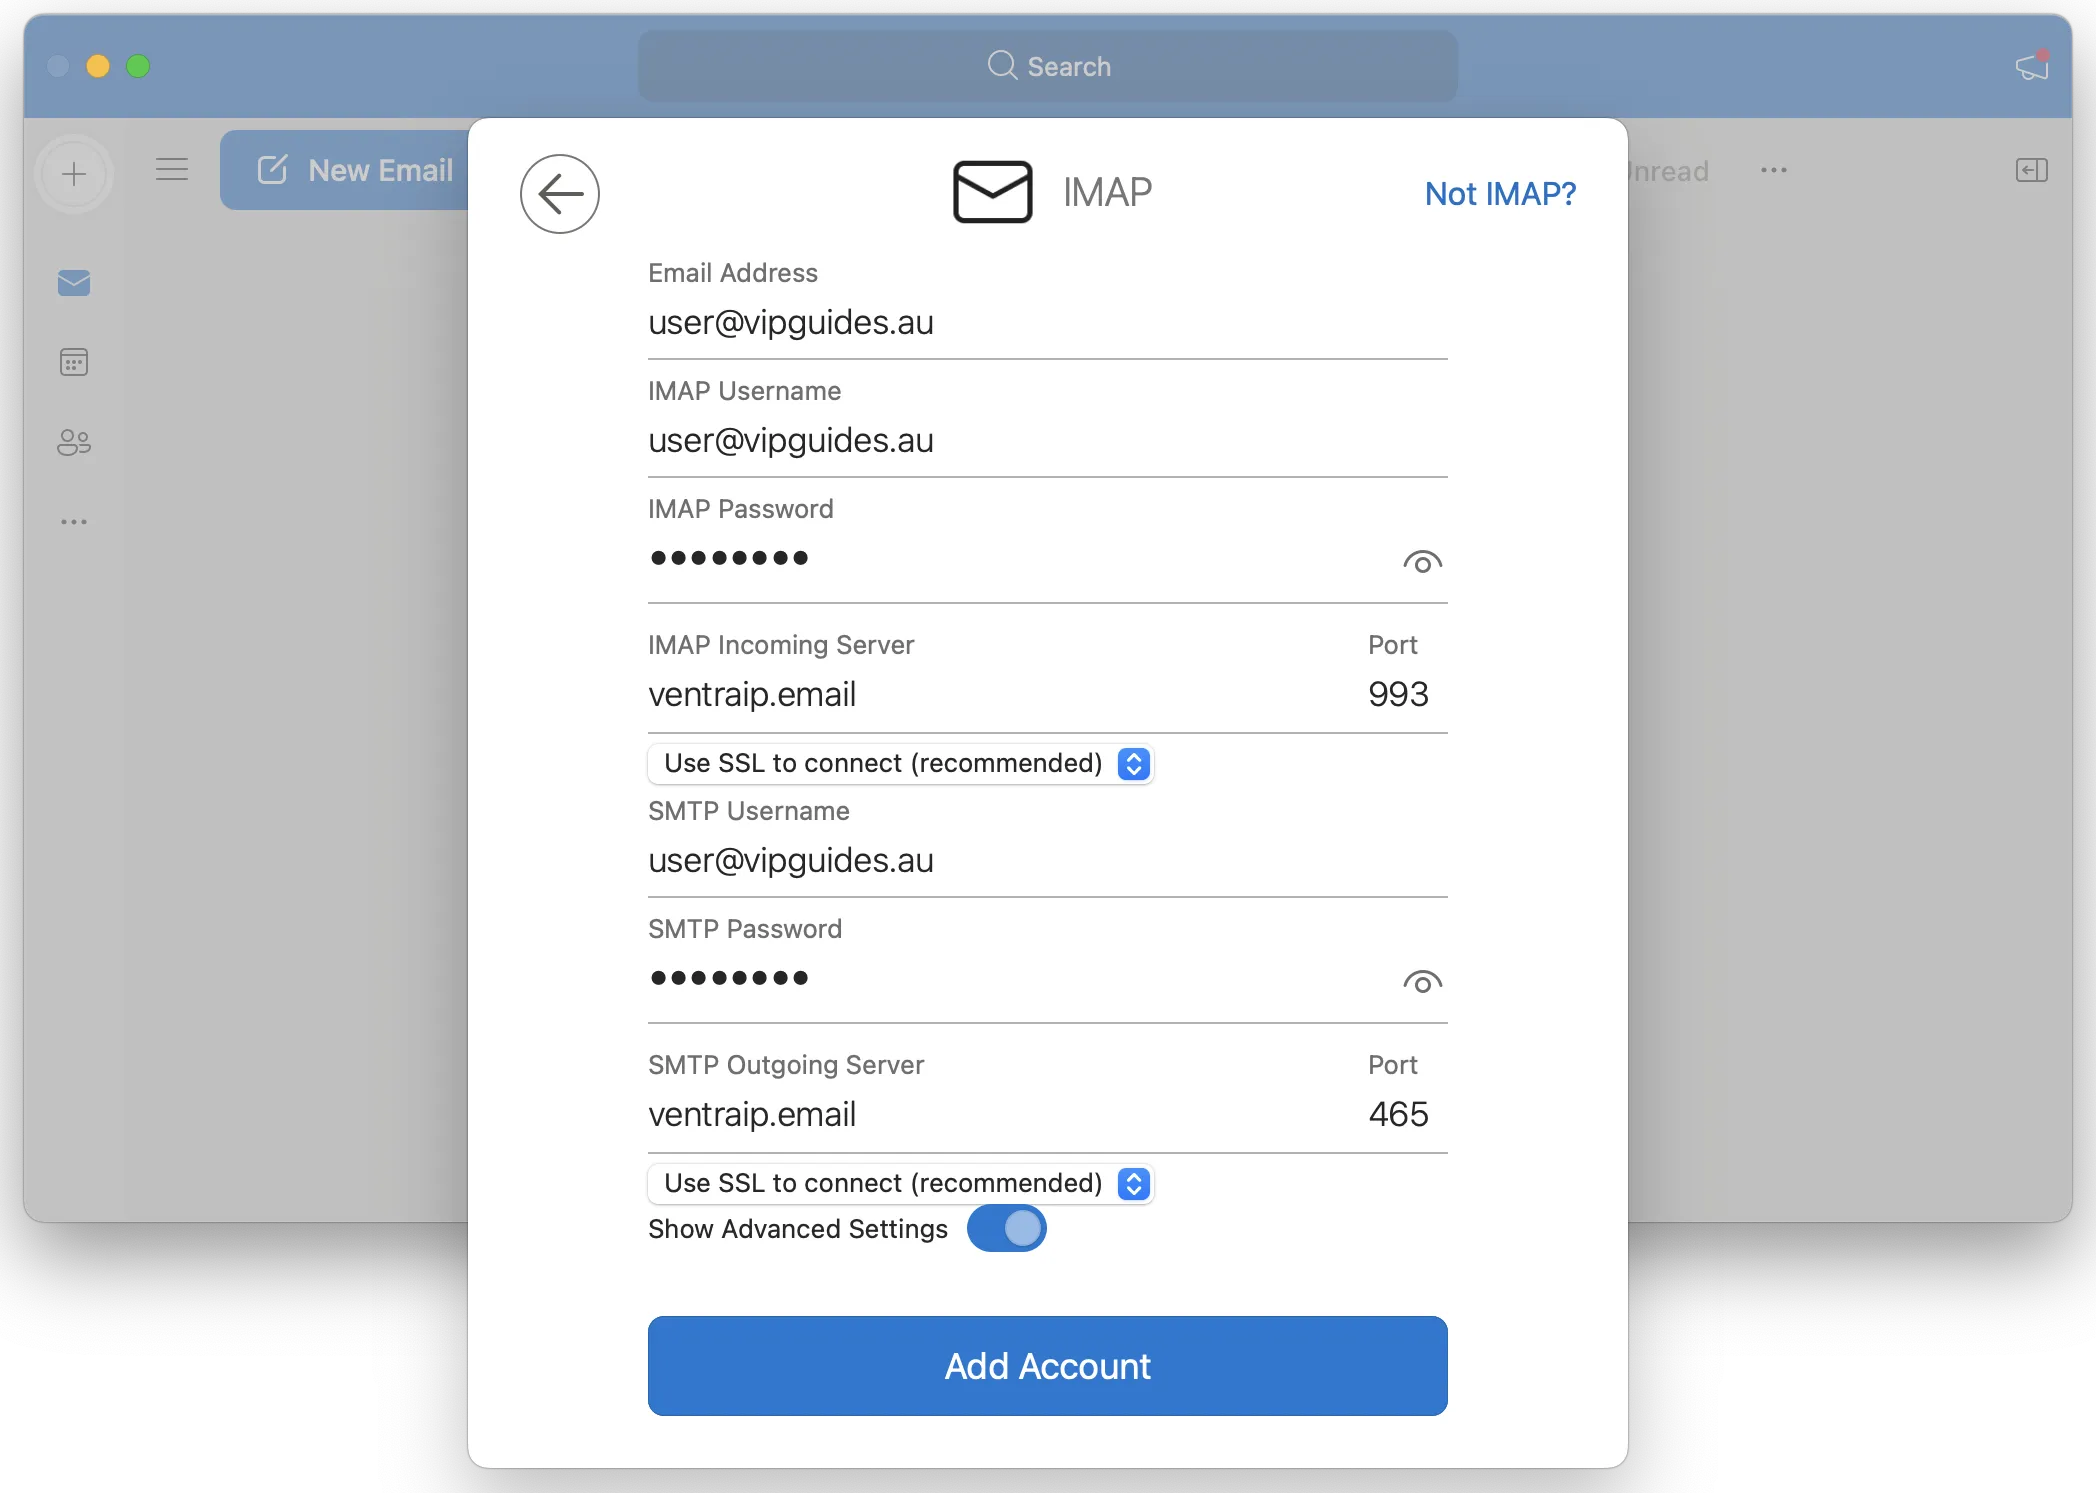
4. Click ‘Add Account’ and Follow Final Personalisation Prompts
Done!
🔧 If you are running into any issues, take a look at our guide on Troubleshooting Email Client Problems.
Still having issues setting up?
While our support for third-party email software is limited, we’re happy to help where possible!
If you encounter any errors during configuration, please submit an eTicket with screenshots of both any error messages and your configuration settings so we can assist you.
For advanced troubleshooting needs, please consult a local IT technician or contact the software vendor directly.
