
Browse by Popular

Domain Name
- What is a domain name?Eligibility criteria for registering .AU domain namesPremium domain names explained

Web Hosting
View All
Email Hosting
- Outlook 365 (Classic) Email Setup GuideMail app setup for iOS (iPhone + iPad)Gmail (webmail) email setup

Google Workspace
- Getting Started with Google WorkspaceGoogle Workspace support resourcesTransferring an existing Google Workspace service to VentraIP

Account
- How do I reset my VIPcontrol password?How do I create a VentraIP account?How can I see who accessed my VentraIP account?

Troubleshooting
- How do I clear my browser cache?Troubleshooting a ‘500 internal server' errorTroubleshooting with a ping test
Managing your Domains Nameservers & DNS with VentraIP
With your domain name registration, you have the ability to manage your nameservers and DNS records either with VentraIP directly, or utilize a third party hosting provider.
Here are the steps to access the DNS management area:
- Log into VIPcontrol.
- Go to “My Services” -> “Domains.“
- Click on the “DNS” button to the right of the domain you would like to manage.
- You will then be presented with the following options:

VentraIP Hosting
We recommend this option if you have a hosting service with VentraIP.
This option automatically connects your domain to your VentraIP web hosting service. It works by updating your domain’s nameservers to the associated hosting that matches your domain, allowing you to manage the DNS records directly within your cPanel account (accessible via VIPcontrol or cPanel).
You can do this by clicking on the “VentraIP Hosting” Tab -> Selecting the hosting service you would like to connect to, and click on “Connect to Hosting Service”
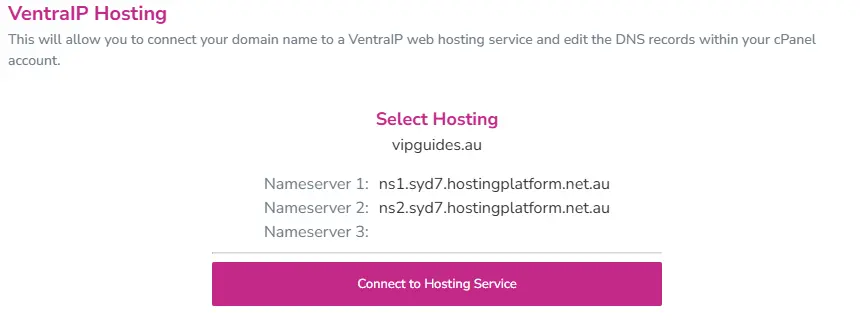
On the next screen, click the two checkboxes and click on “Set DNS.“
How do I add, remove or edit DNS records for VentraIP Hosting?
You can check out our guide for adding, editing and removing DNS records for this option below through VIPcontrol:
If you prefer to use cPanel’s Zone Editor to manage the DNS records directly within your web hosting service, you can use this guide here.
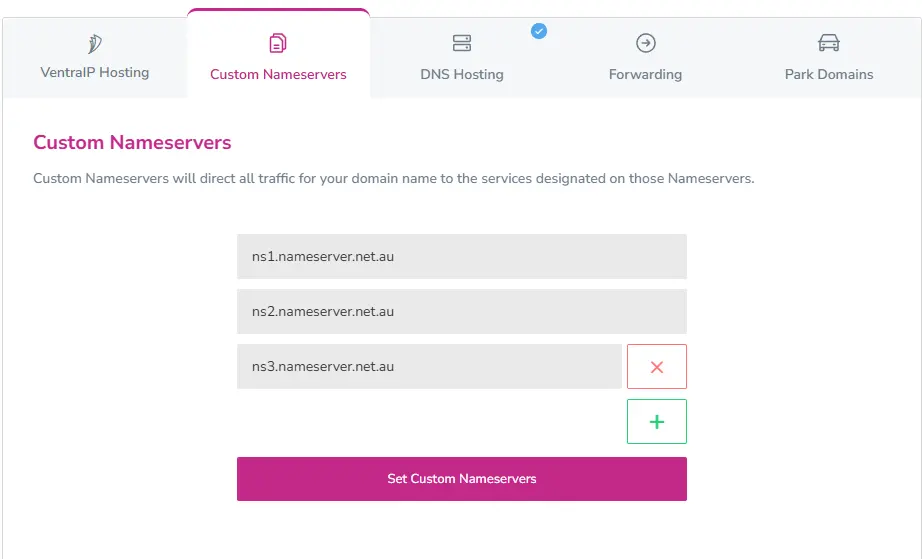
Custom Nameservers
Here you will be able to enter alternative, or even modify your existing nameservers that you may already be using. Using ‘Custom Nameservers’ is most often required if you are connecting your domain name to an external DNS host such as Cloudflare.
To set custom nameservers on your domain, click on the “Custom Nameservers” Tab and enter the nameservers that you would like to update the domain to. Once entered, click on “Set Custom Nameservers“
More information on this can be found in our dedicated guide here:
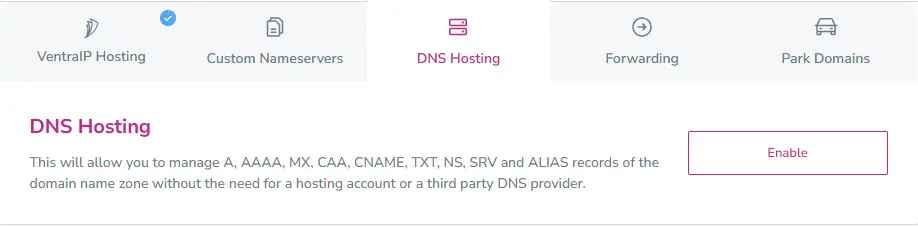
DNS Hosting
This will allow you manage A, MX, CNAME, TXT, NS and SRV records of the domain name zone without the need for a hosting account or a third party DNS provider. This is especially helpful if you wish to use us for your external DNS hosting or simply want a few records to point to different locations (such as a mail only domain name).
You can do this by clicking on the “DNS Hosting” tab and selecting “Enable“.
How do I add, remove or edit DNS records for DNS Hosting?
You can check out our guide for adding, editing and removing DNS records for this option below through VIPcontrol:
Forwarding
This allows you to setup HTML, Cloak, 301 Permanent and 302 Temporary redirects which allow you to redirect users to other domains. You can also setup Email Forwarding to redirect emails to other email addresses.
You can check out our guides for adding Email Forwarders or URL Forwarders:
Park Domain
This option allows you to “Park” the domain until you are ready to use it and puts a placeholder page up. This is useful for when you are developing a website for the domain, but it isn’t quite ready to go live yet.
What DNS option should I choose?
- VentraIP Hosting: Select this if you have a VentraIP Web Hosting service.
- DNS Hosting: Choose this if you don’t have a Web Hosting service with us, but would like to use us to point a few records to differnet places (Like an email only domain.)
- Forwarding: This uses our DNS hosting, choose this if you don’t have a website or email services under your domain, but would like to forward web or email traffic to another address.
Important Information
When enabling any of these options, this will immediately replace all existing DNS records (A, CNAME, MX records) with the records present under the DNS zone provided by the new nameservers.
This means, if you have any existing services like email hosting or website hosting or any other custom DNS records, these will stop working until you have either prefilled the existing records or recreate them under your new DNS Zone.
Once the changes have been made, please allow 2-6 hours for DNS to propagate around the world for any DNS updates to reflect.
If you need any help with updating your nameservers or DNS records, or just need a confirmation that the changes that you’re making won’t disrupt any services, please feel free to reach out to our support team and we are more than happy to help!
